
Y’all. The dining room is finally under way! It feels like I might jinx the progress by even typing those words, but it is true! I can see the dining from where I’m sitting and our progress is, indeed, real!
Since spring, the dining room has been on the to-do list and Ben’s been working on the walls—this is the only room that had drywall when we moved in. In hindsight, we probably should have taken it down and started over, but we kept it and its orange-peel texture, so Ben has been skim coating, sanding, skimming, sanding, repeat, repeat, repeat. It was also the only room with a drywall ceiling, and that was covered in popcorn texture and probably 30+ years of living-on-a-gravel-road dust. Ugh.

Luckily, we only had to scrape the popcorn off and not worry about skim coating and repairing the ceiling’s surface because we decided to cover it—with barn wood. I can hear you asking, “What? You’re putting barn wood where?” Even Ben said, “I was worried it would look like a bad restaurant.” But just wait. You will love it. WAIT! I’m jumping ahead. Keep reading, dear friend, to see the dining room ceiling journey…


If you ever find yourself needing to remove old, dusty popcorn from a ceiling, do this: working in small sections, spray water using a clean pump sprayer on the ceiling. Let it soak. Then scrape the ceiling with a flat edge. We purchased a tool for the job that allowed a garbage bag to be attached and catch the falling stuff, but it was still a huge mess. Ben says 50% missed the bag and really any straight edge will do.
Once the scraping—and clean up—was done, Ben painted the ceiling dark gray. We learned the hard way on our second floor that when you put barn wood on a white surface, the white really glares through any knots or holes (kind of like when my lily-white skin shows through a run in my black tights). Painting the wall dark keeps those beautiful imperfections from feeling distracting. Note that the paint job doesn’t have to be a good one (as you will see below), it just needs to cover most of the white.


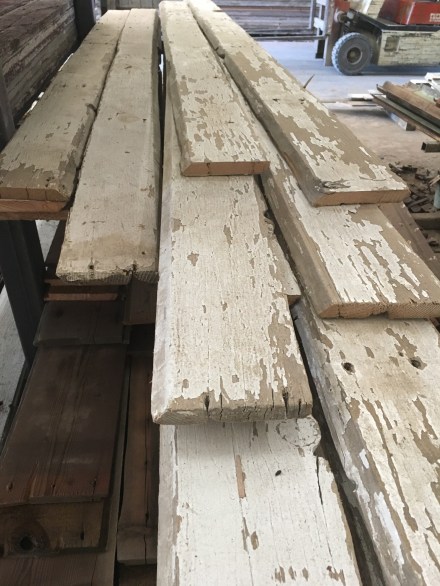
We visited our friends Beth and Scott at Iowa Barn Boards and picked out corn crib siding in two sizes, 3.5-inch and 5-inch reveals, all of which was at one time painted white. By the time we brought it home, it was all really various shades of grayed-out bare wood and some chips of white paint.


Over Thanksgiving weekend, we took advantage of the 60-degree, sunny days to clean each board with a stiff brush. The dust and old paint were flying. And the allergies were going strong. Then we coated each board in clear satin polyurethane.


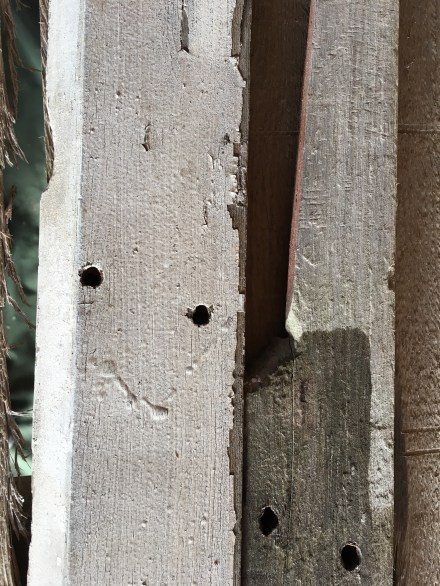
I was nervous about the color change as the many-years-dry wood soaked up the liquid. Sometimes wood goes orange when clear coated. But we did some testing before painting all the boards. Here’s what we got…the darker parts of each board are clear-coated. Darker, but not orange.
By Sunday night of Thanksgiving weekend, all the boards were clean (ish…clean is really not a possibility) and clear coated and although the poly was quick-dry, we let them cure in the garage for a couple of warm-ish days and cold nights.
A few weeks later (the next time we were both at home together for a few days and able to dedicate time and energy to the project), we installed the planks.


I created a pattern for use to follow (on graph paper, of course), and we brought the planks into the house one at a time, installing each one before bringing the next one inside.


Many of the planks (all of the narrow ones and several of the wide ones) were long enough to span the 13 feet-long room and we installed those as single pieces. Others we spliced together, staggering the joints as we went.


By the end of day one—well, not the end of the day, but our late-afternoon stopping point so that Ben could get out into the woods for his evening deer hunt—I was absolutely in love!! The ceiling was half way across the room and well on its way to being exactly what I imagined!
On day two, we kept marching planks across the ceiling…all the way to the beam that separates the living and dining areas (where we removed a load-bearing wall in the very beginning). You can see the living room side of the beam, below right, is covered in barn wood.


And finally…time for the very. last. piece.

The ceiling is just the dining room’s first finished feature. It still needs a lot of work…finish up the last of the sanding and paint the walls, install crown molding (also barn wood), install the floorboards and trim, and build the wall of bookshelves that will wrap the bathroom door (the thin wood panels you see on the wall behind Ben, above, will be painted white as the backs of the bookshelves), and finish wrapping the beam (you see the dining room side of the beam on the right side of image above) in barn wood. A long to-do list, just for this one small room! Not to mention bringing in the furniture and installing my gorgeous chandelier.
BUT, the ceiling is so fabulous, it will keep me happy for a while.


Amazing project! You two are geniuses!! Can’t wait to see the entire room when finished!