
As you may remember, we have been living these past two years with the cabinets and countertops that came with our farm house. We were assured by our sweet neighbor, Elaine, that these hard-working, never-die cupboards not only served the former owners of our own home, but also her! In fact, they were at home in her kitchen from 1976 (when she moved in) until the mid-80s when she remodeled and handed them down (quite literally down the hill) to Donna at our house.
When we moved in two+ years ago, we totally reworked and moved the kitchen to another wall. We took down the uppers (some of them are now in the mantainer for storage), moved the lowers to the new kitchen wall, hacked up the L-shaped countertop to make it work on our new configuration, and held our breath in hopes that they would last until we could get new ones.
Here’s a reminder of just how fabulous they were:


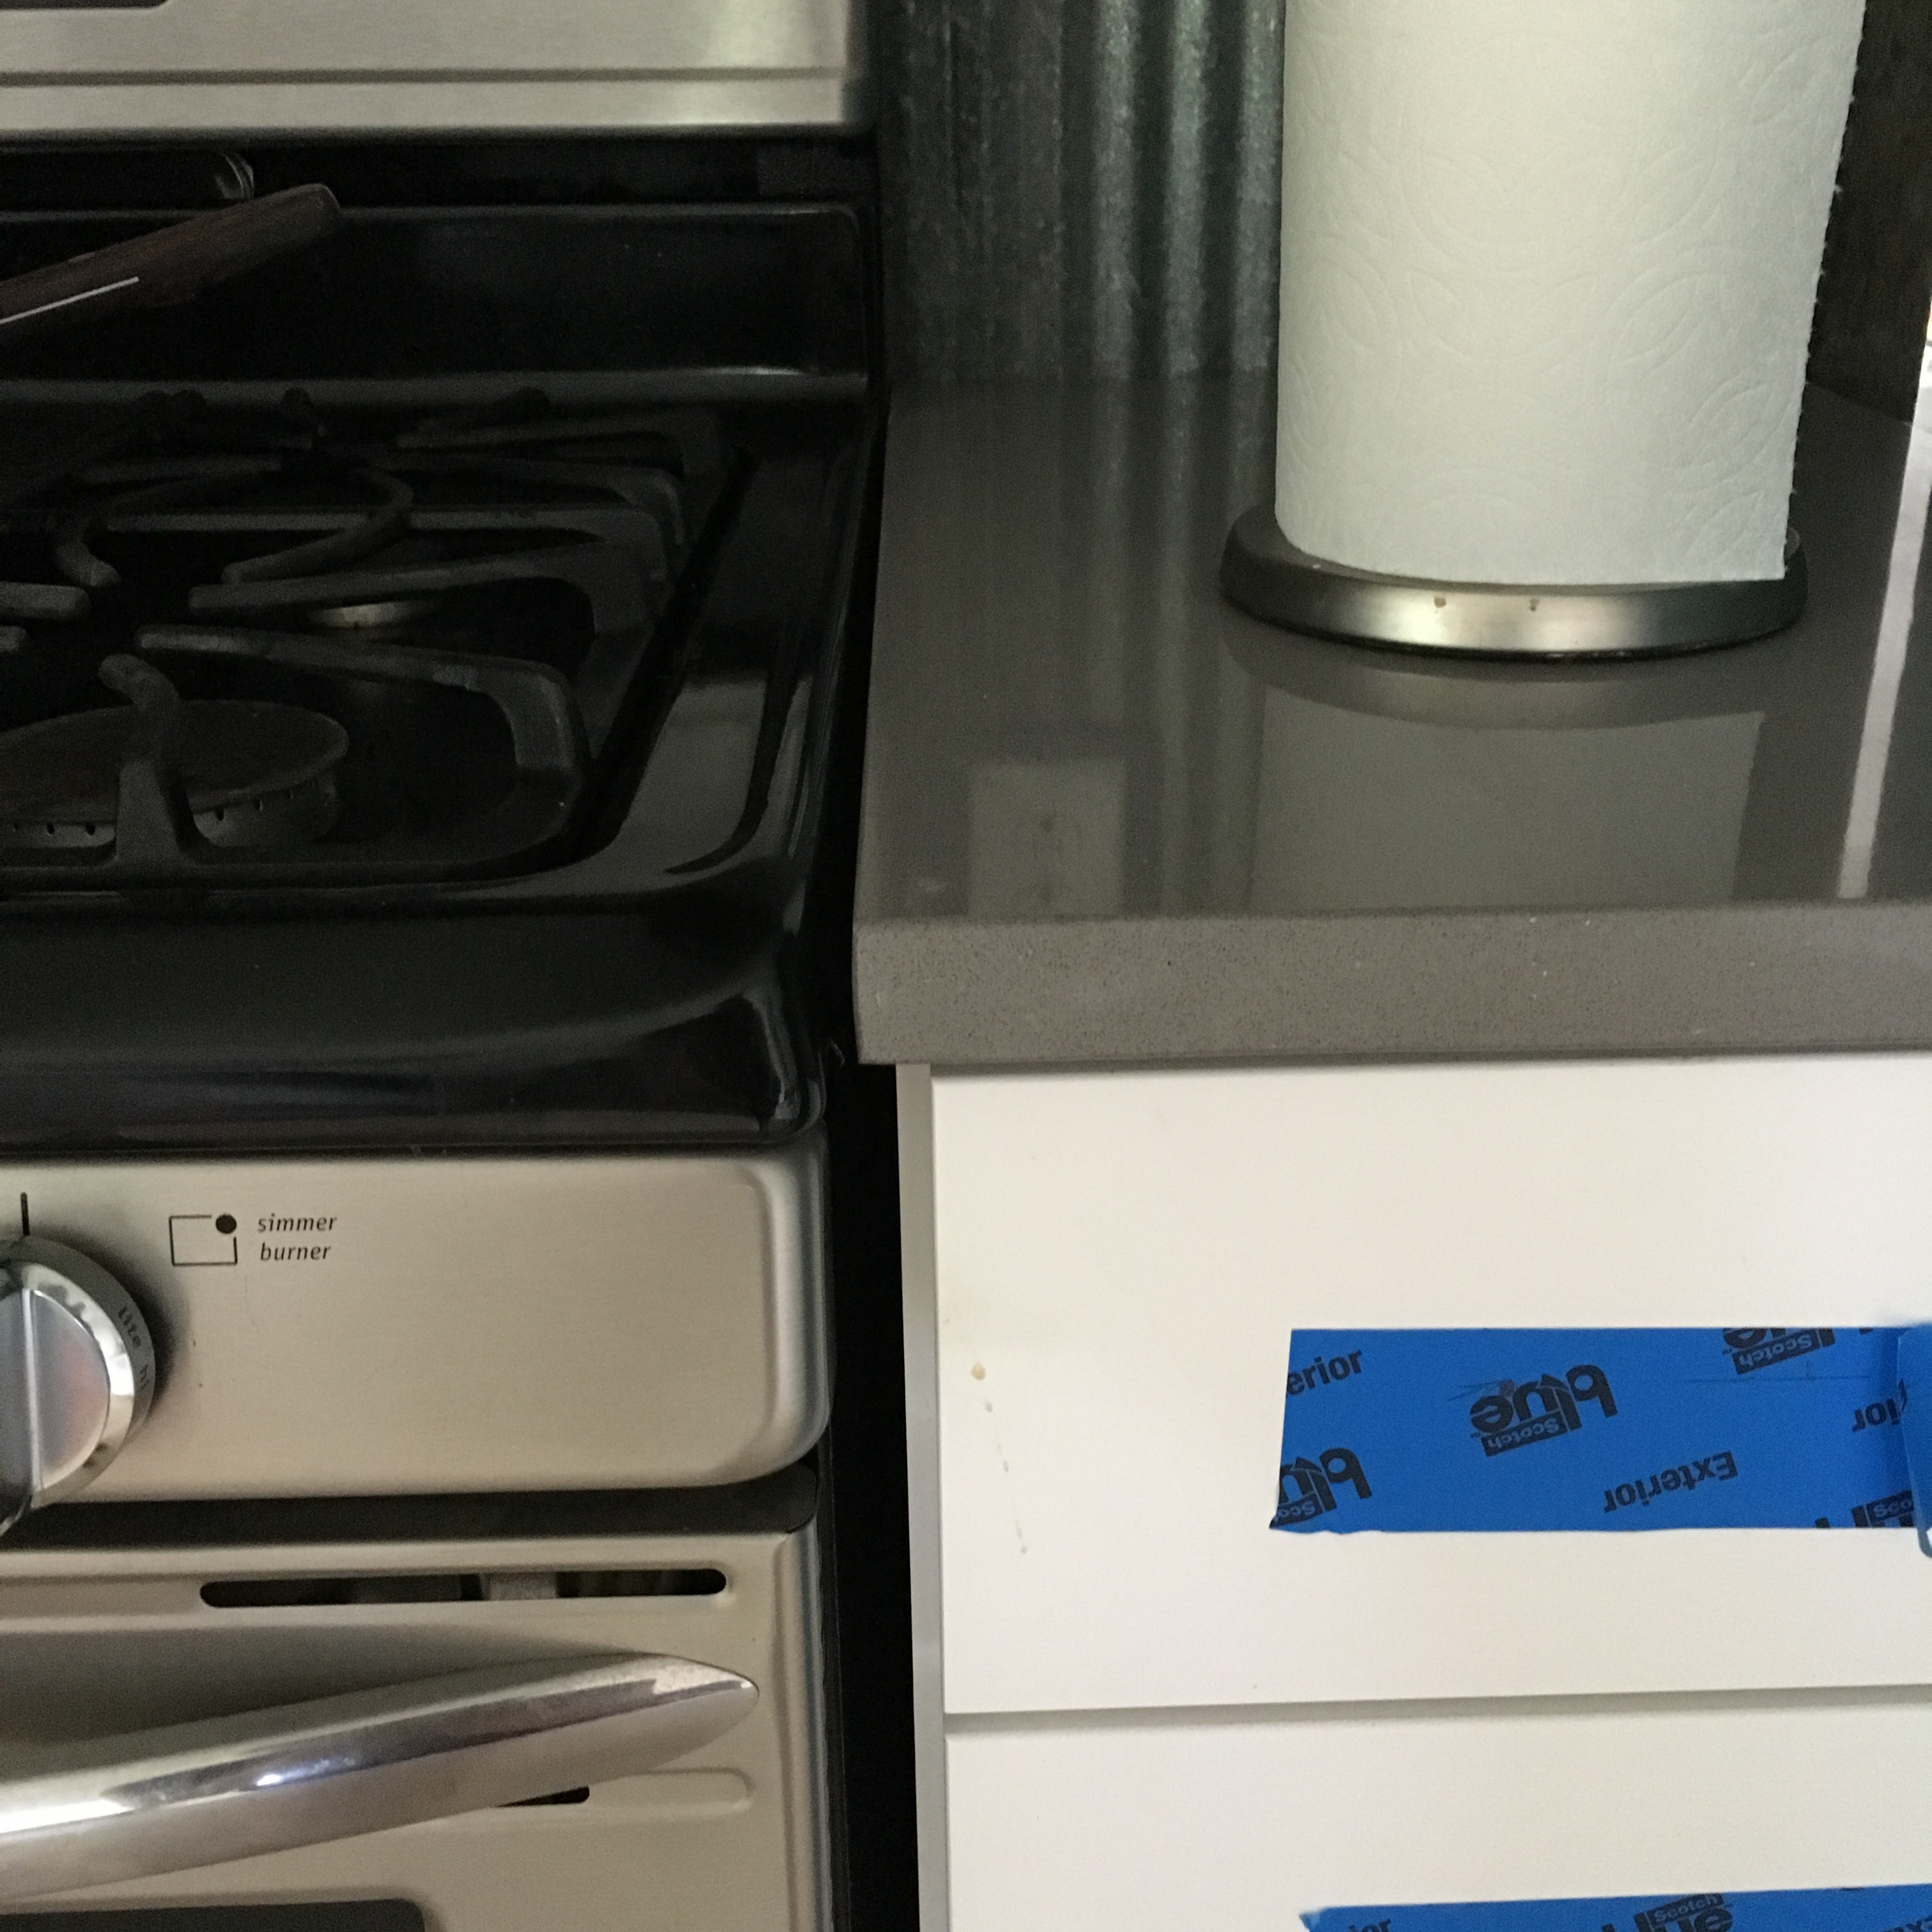
Note the lovely countertop edge where we had to cut to fit above the open box (this was the cabinet where to corner of the L-shape happened, so there was no door).

Note the counter edge next to the stove where it is just broken off. These kitchen hardships are what make you really appreciate having something above and beyond a we’ll-make-it-work version.
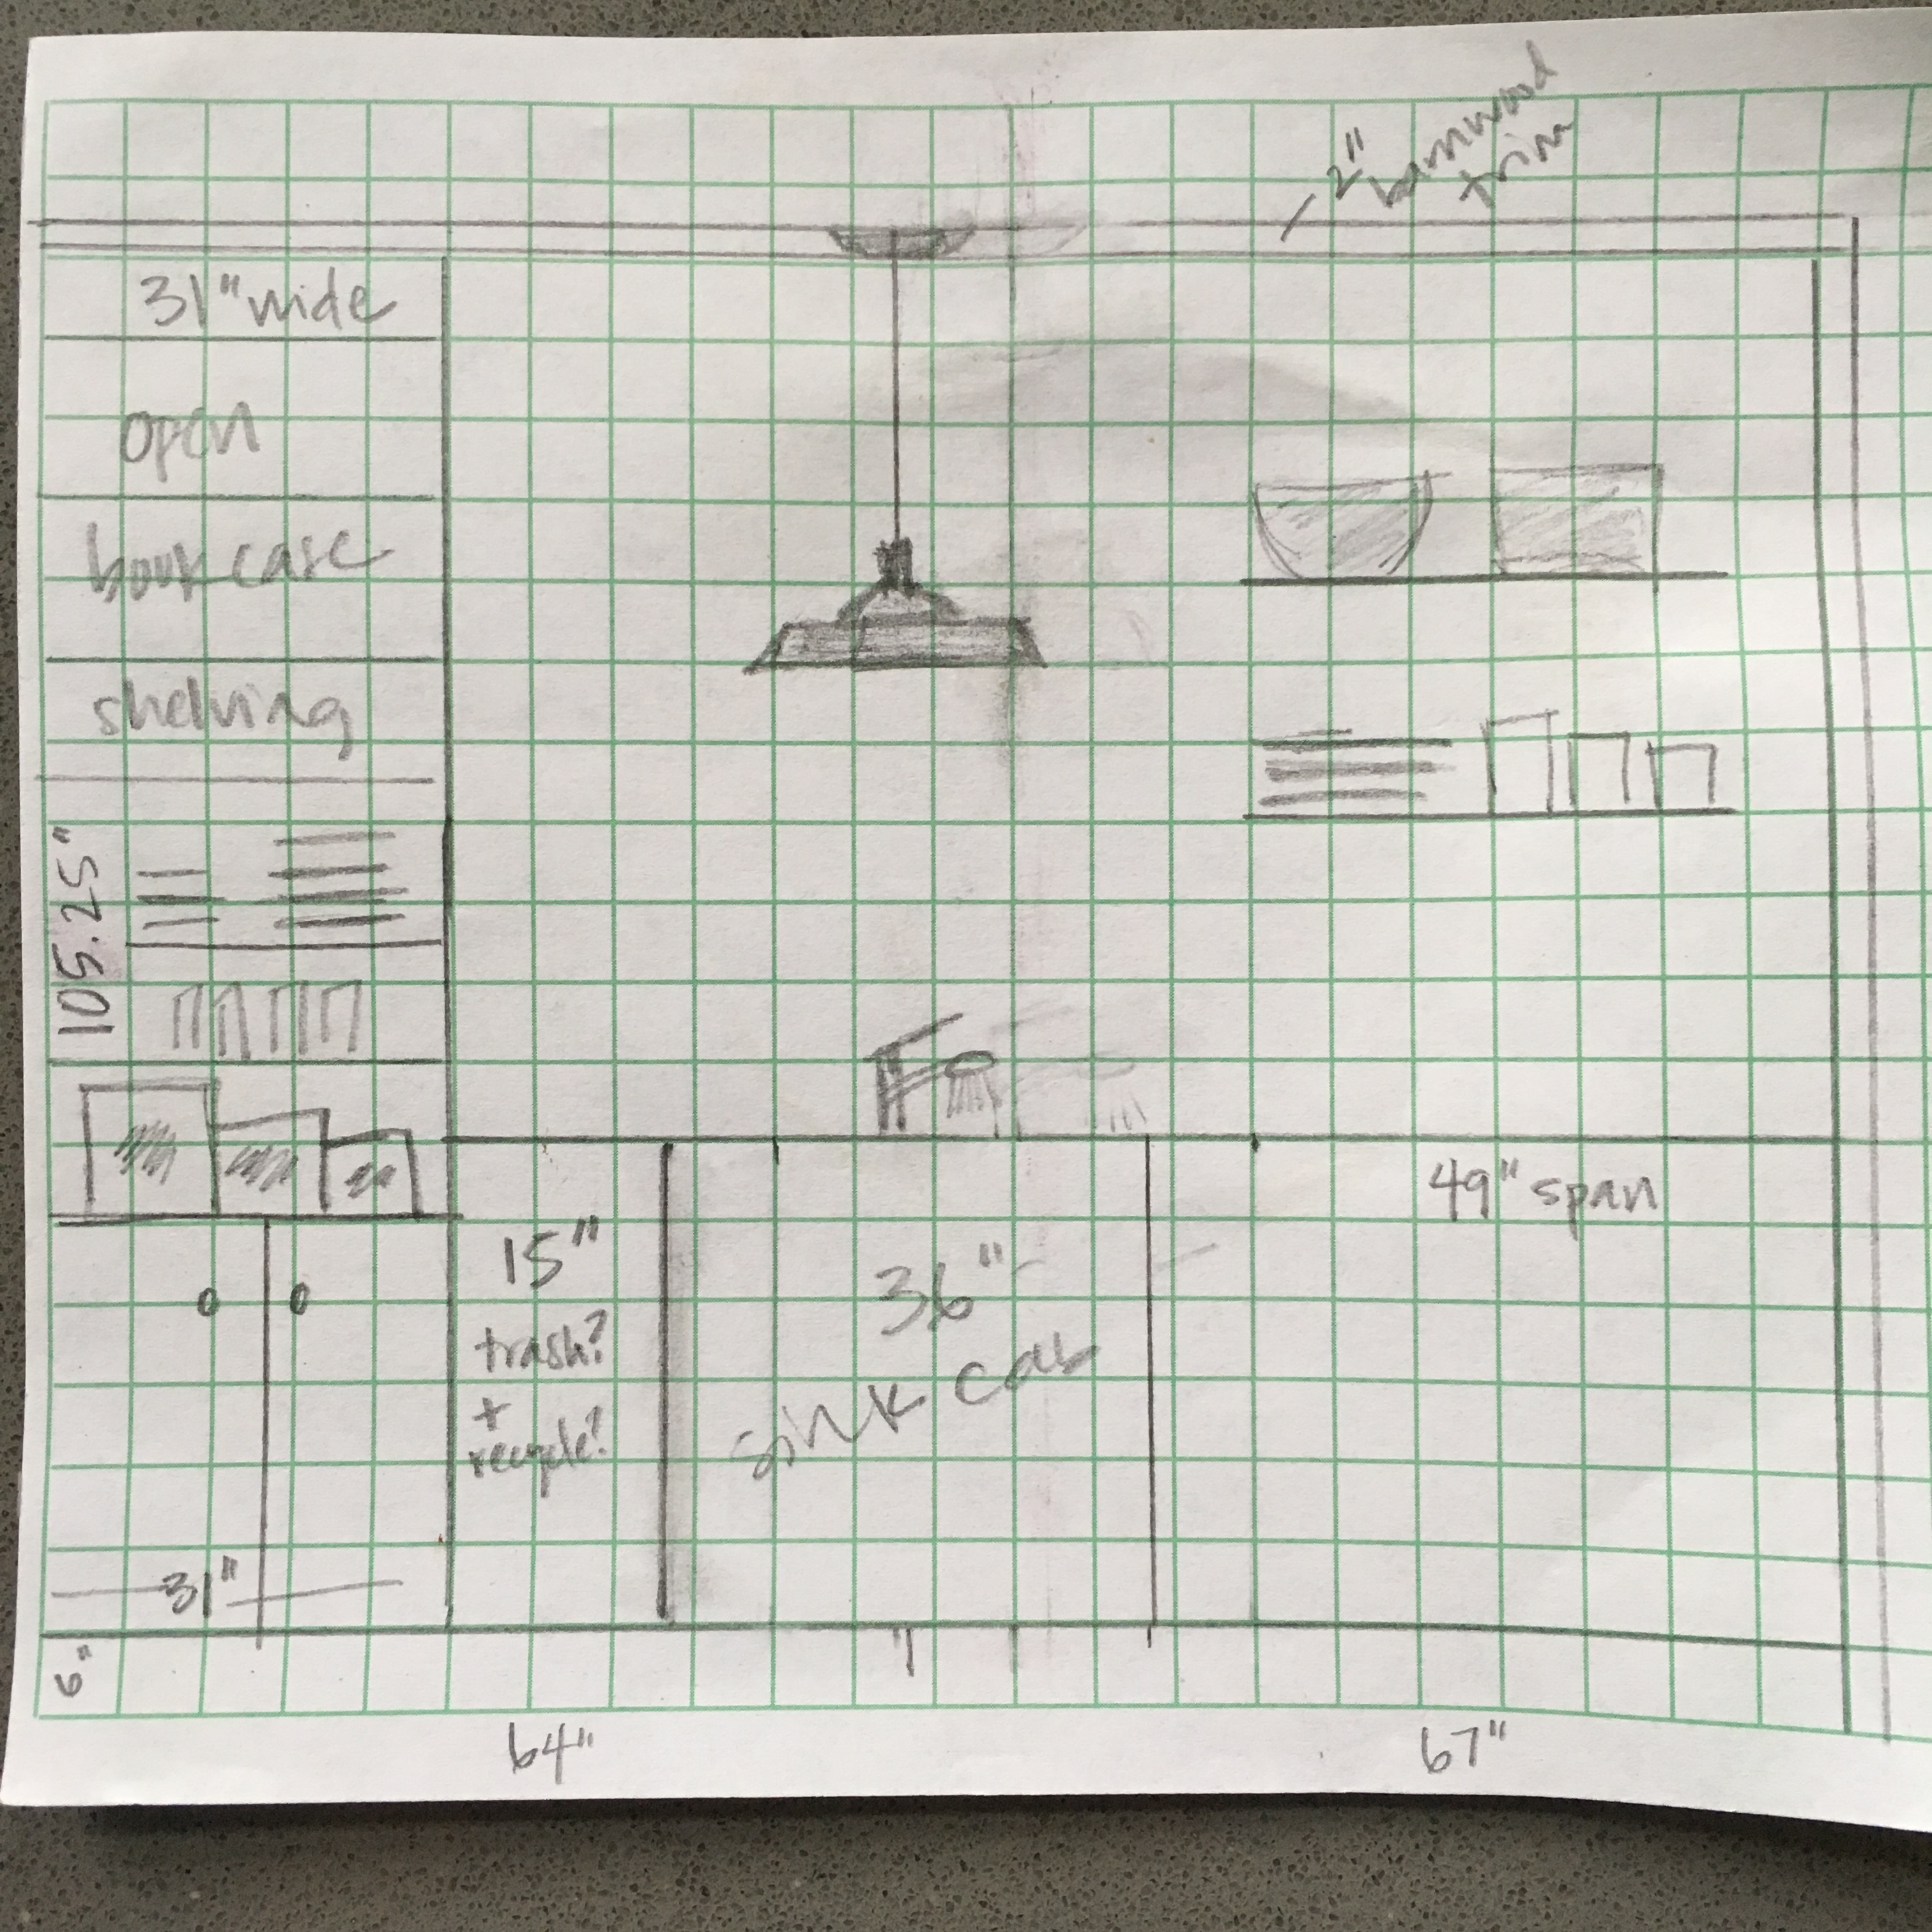
In all my dreaming about what our new-and-improved, of-this-millenium kitchen would be, I researched, compared prices and brands and options, made many sketches, and finally landed here:

And after a few visits to Lowes to think, discuss, touch and feel samples, and visit with a kitchen designer who could take my sketches, put them into a 3D design plan and price them out, I finally landed here:

And, my friends, I am pretty proud of that price tag! I happened to just stop by Lowes to check and see if they were having a sale over Memorial Day and low (pun intended)-and-behold, there was a 20% off sale on my cabinet brand and an offer of 24 months no interest if I used my Lowe’s card. Where do I sign? So I did it. Yes, I was sweating a little and probably shaking a bit. But I did it.
And about a month later, this happened:


And when we unwrapped all the cardboard, it was better than Christmas and birthday and surprise-party-for-no-reason-at-all!


Bring on the storage!! I was soooooo ready! And then, the installation began…
Who could have guessed that there was so much leveling and shimming involved in installing cabinets? Turns out, our 100 year-old abode itself wasn’t level. So our DIY cabinet installation also involved some floor jacks in the basement. We won’t go into that.
Moving on…
Our sink is a stainless apron front version. Suffice it to say the installation directions that come with the sink are not the most helpful. Luckily, we were at the beginning of month’s wi-fi allowance (yay for satellite wi-fi!) and Ben was able to watch a few YouTube videos on the subject.
Basically, you have to cut the front panel of the sink cabinet to fit your sink’s actual measurements and build a bit of scaffolding inside the cabinet to hold the weight of the sink and keep it level.
You know what they say…measure twice, cut once. So I measured. And measured. And measured. And poured myself a drink while Ben started up the saw…
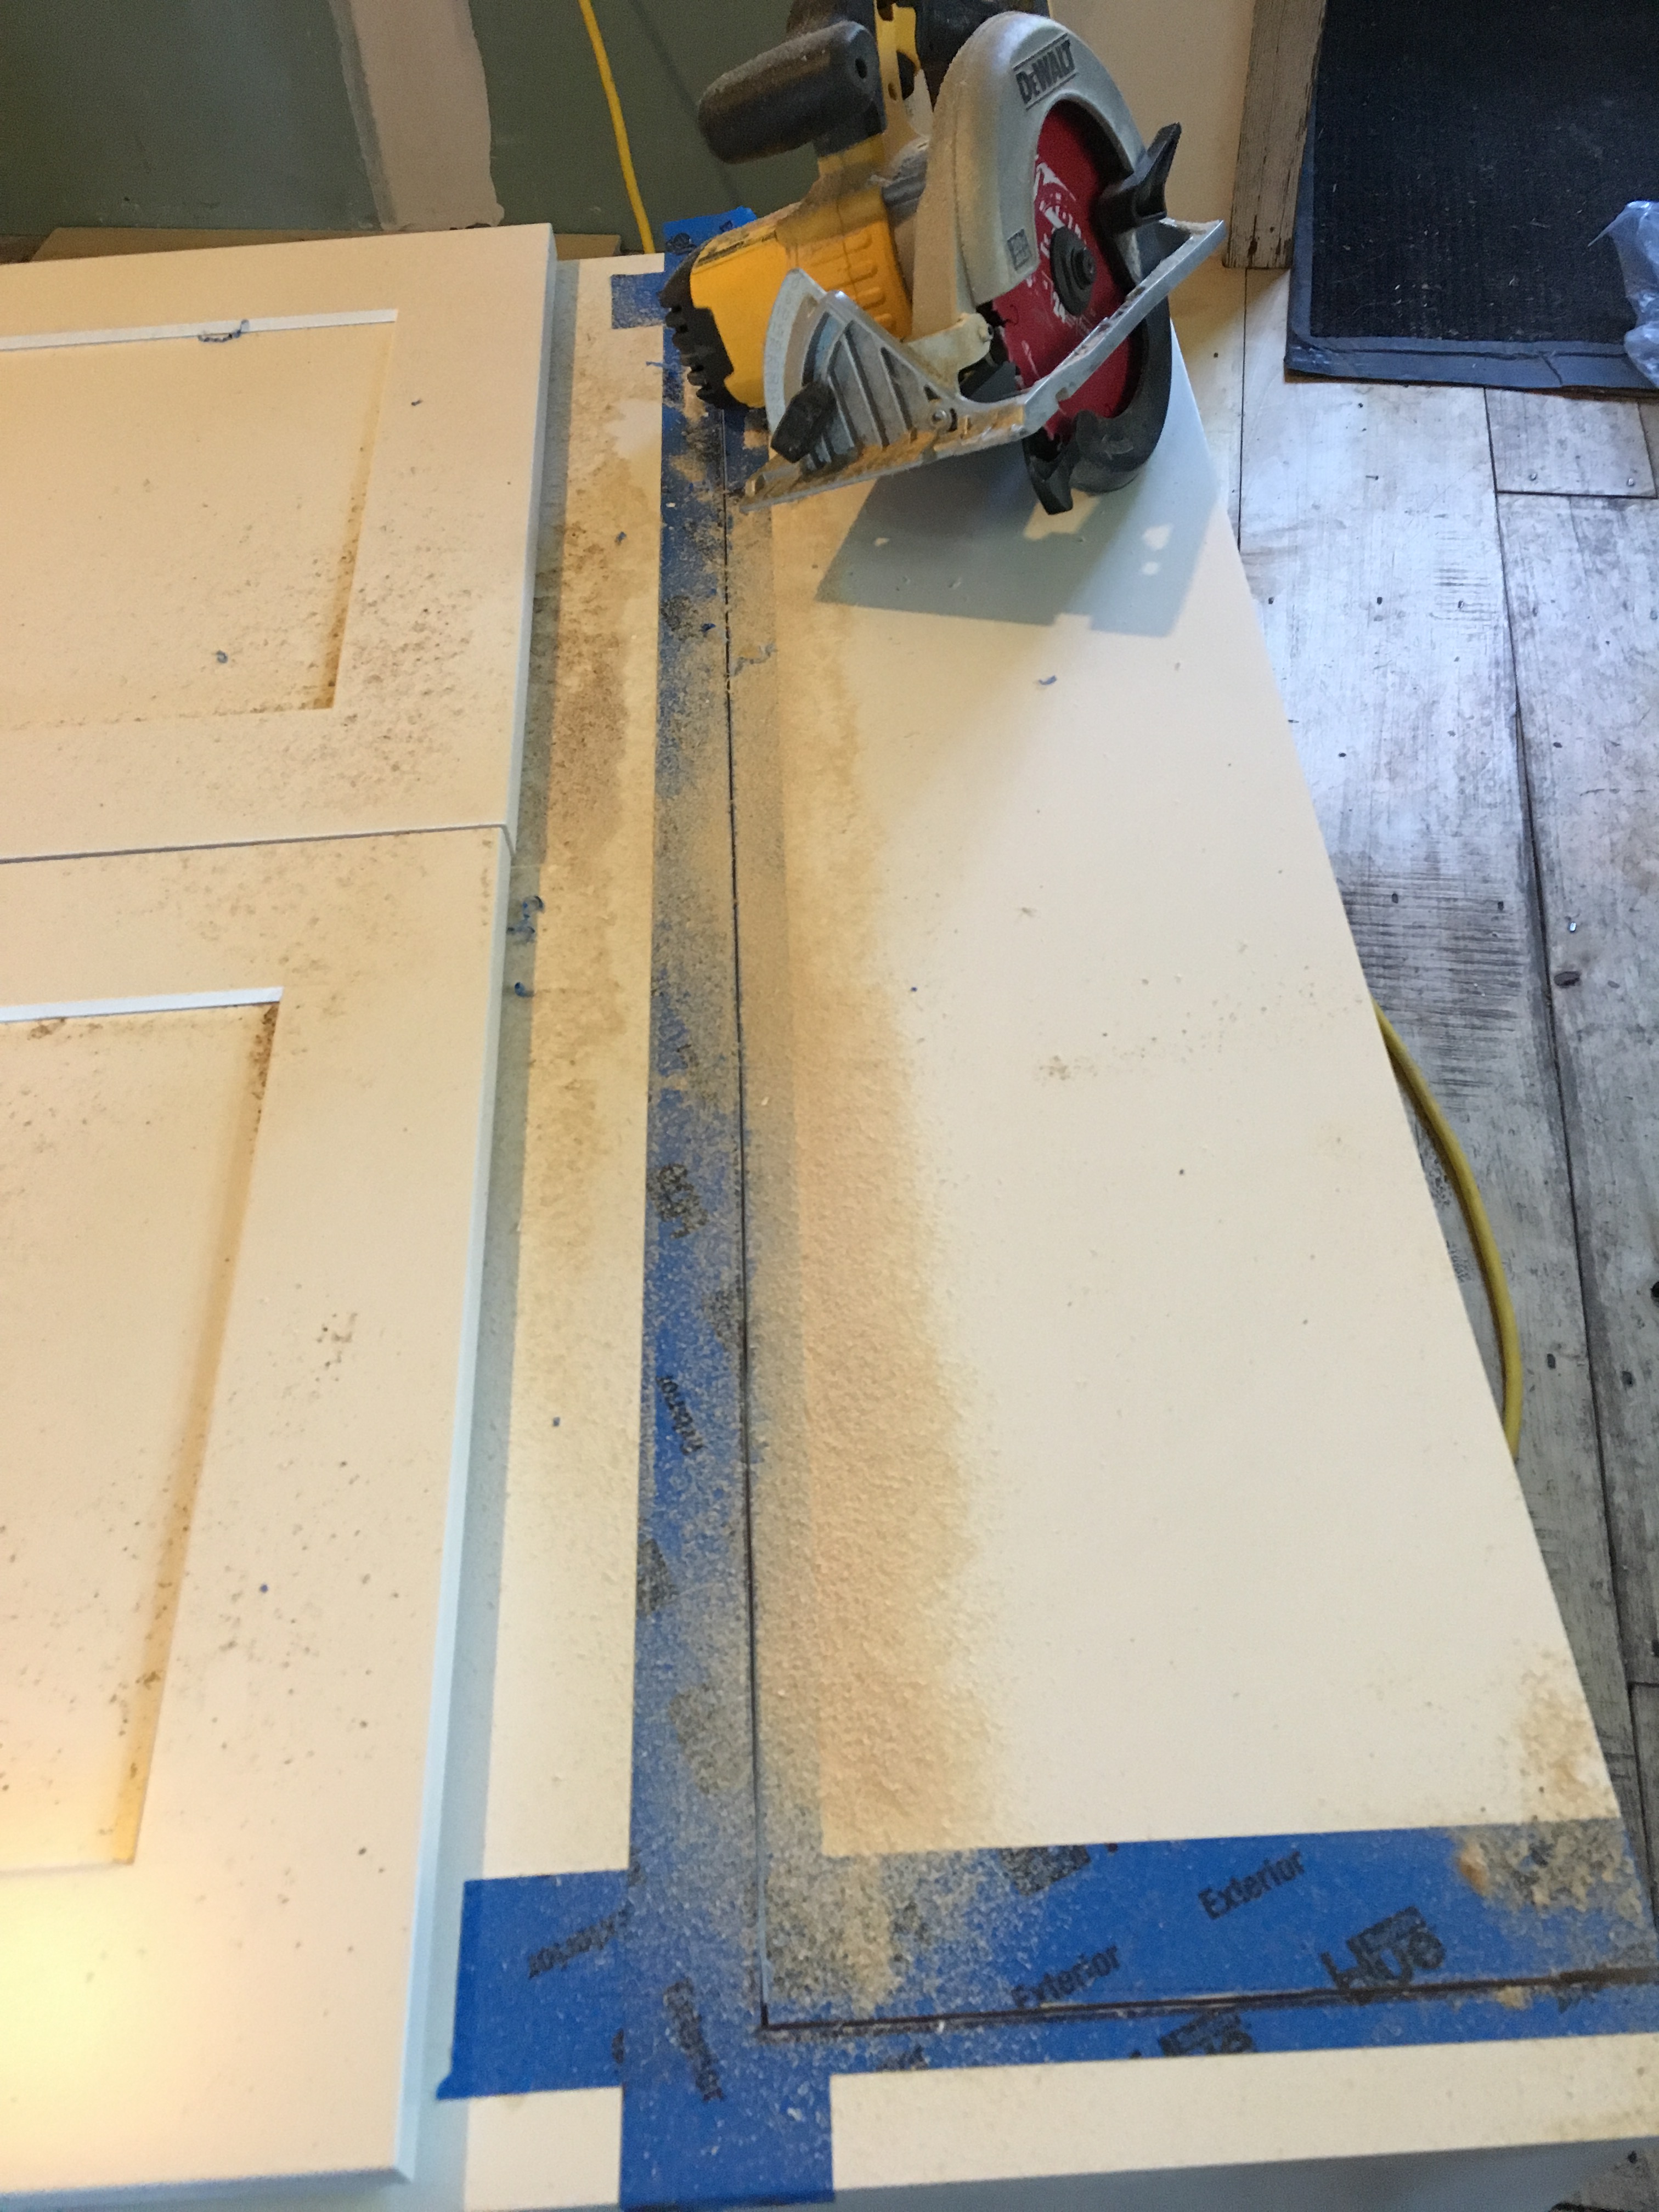
As you can see above, I wasn’t so sure we’d gotten it right. But…
…SUCCESS!!!!!!
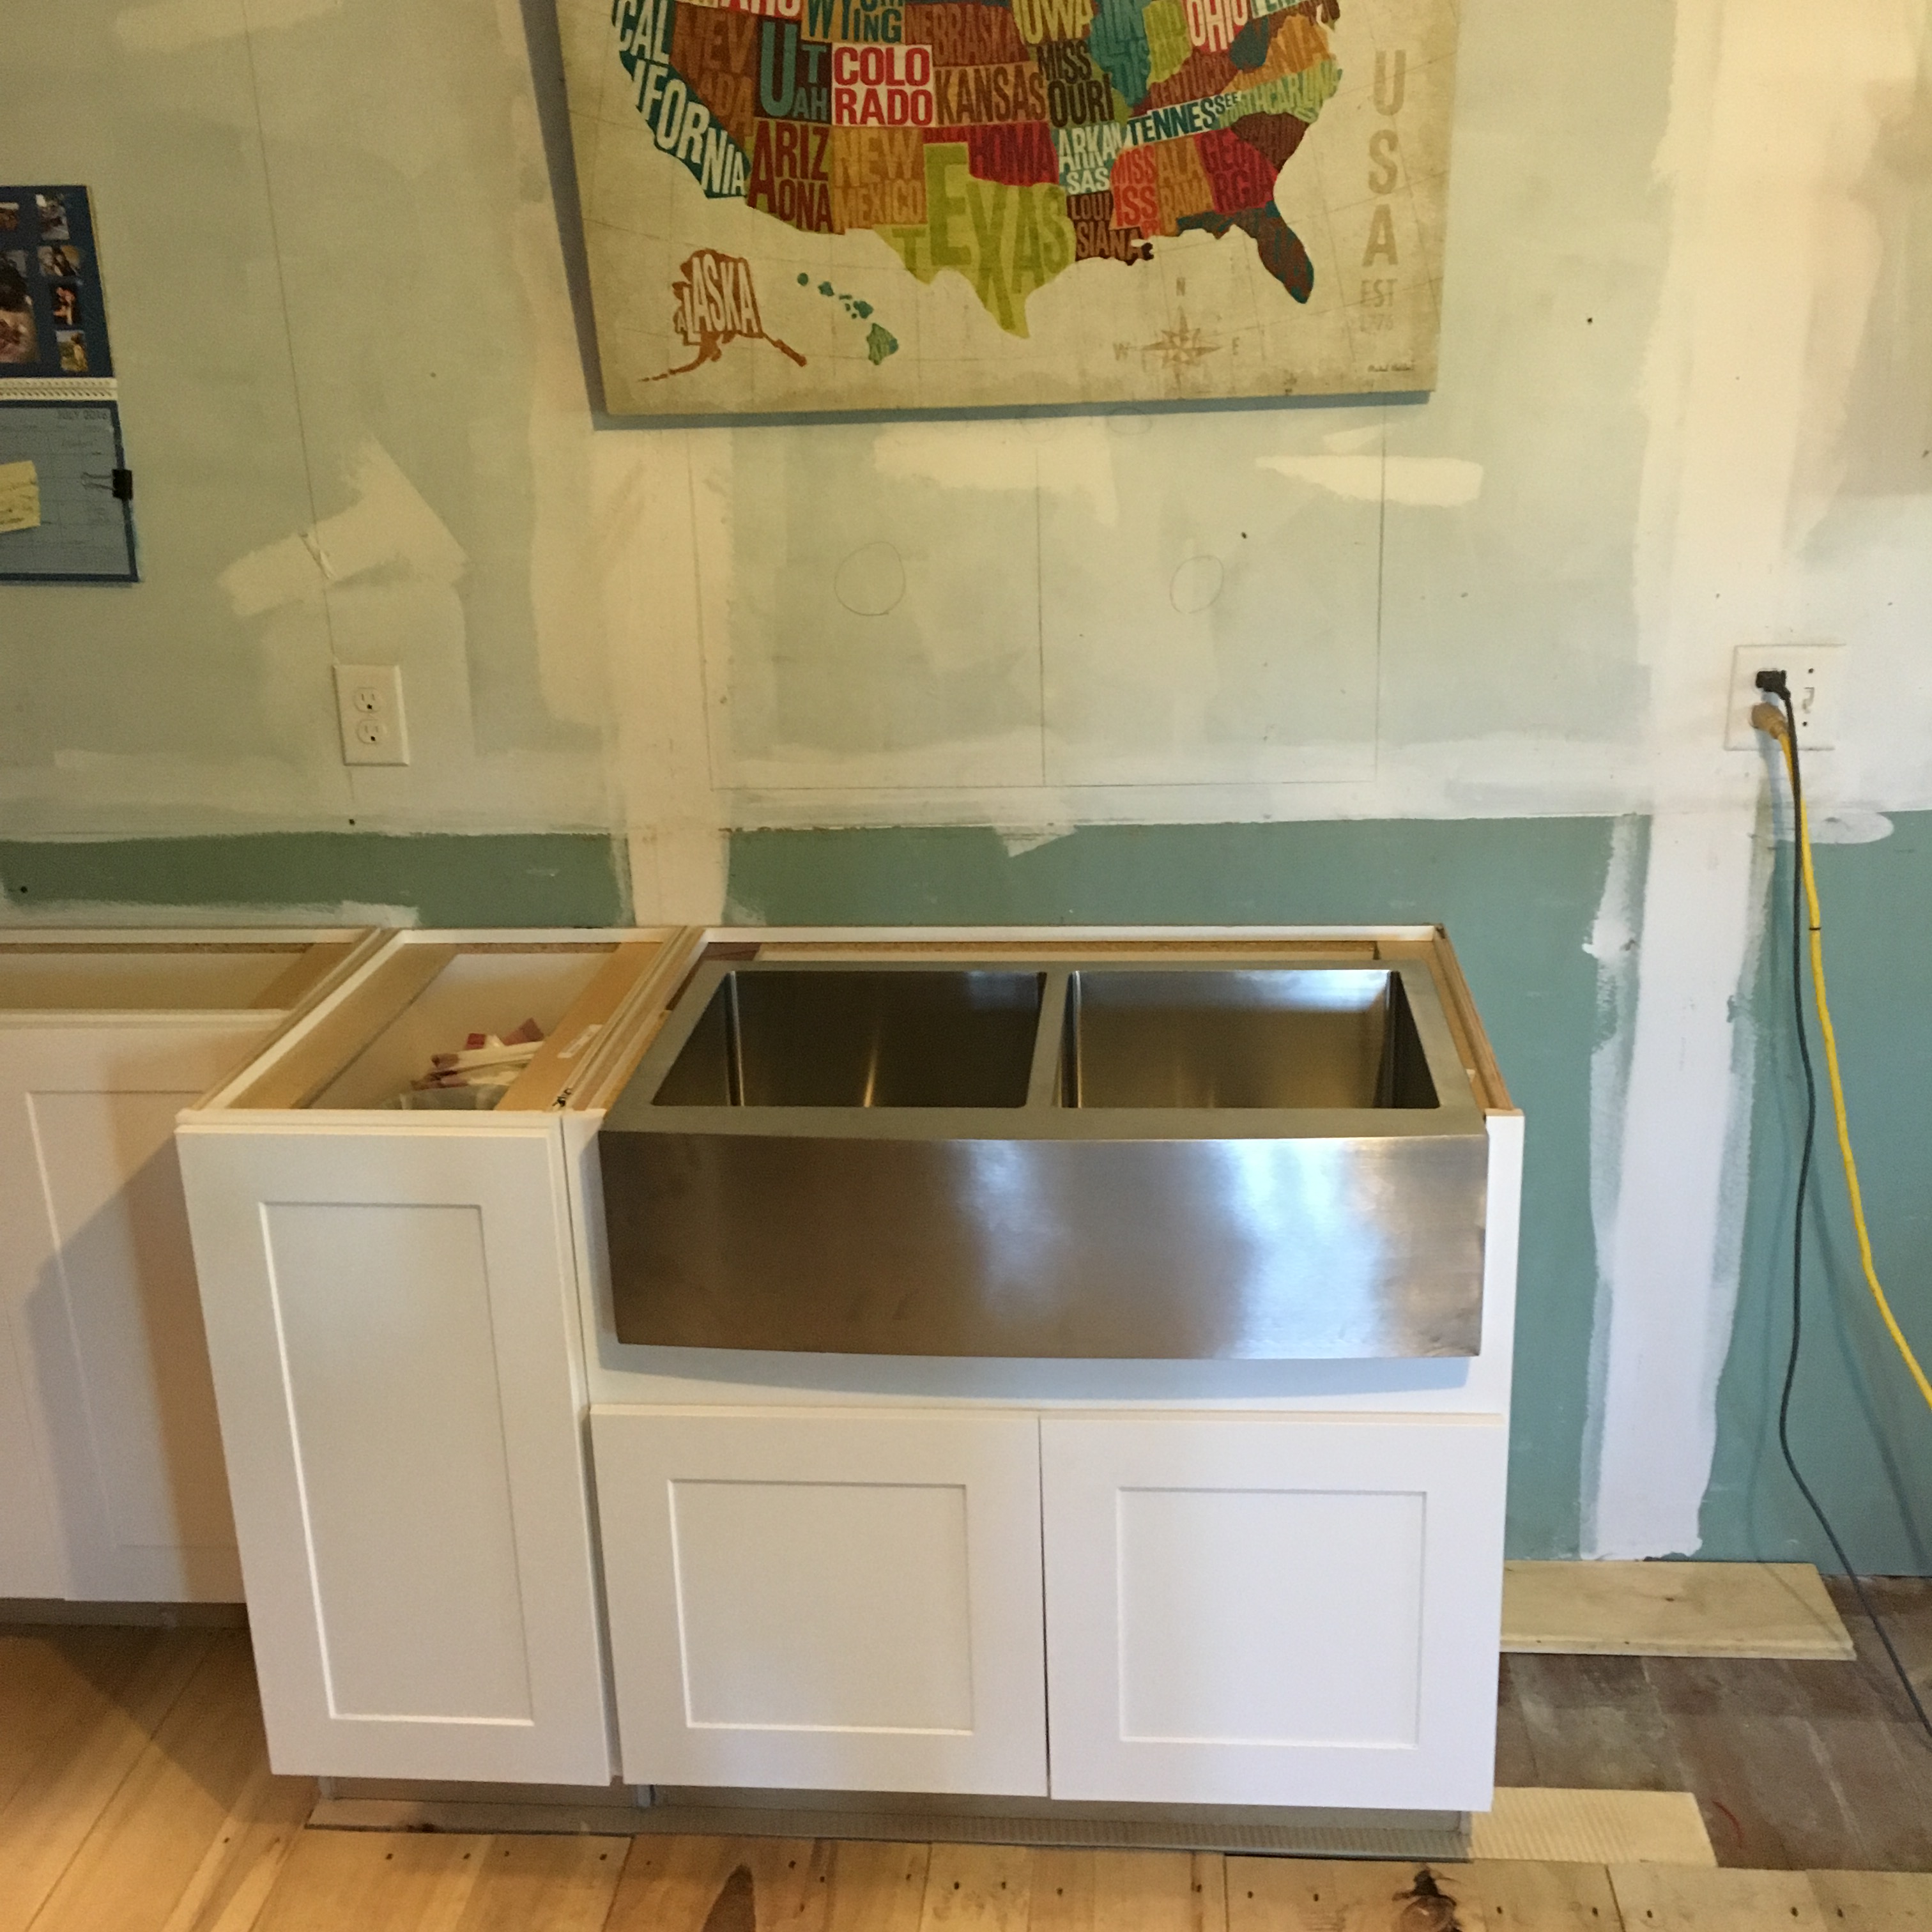
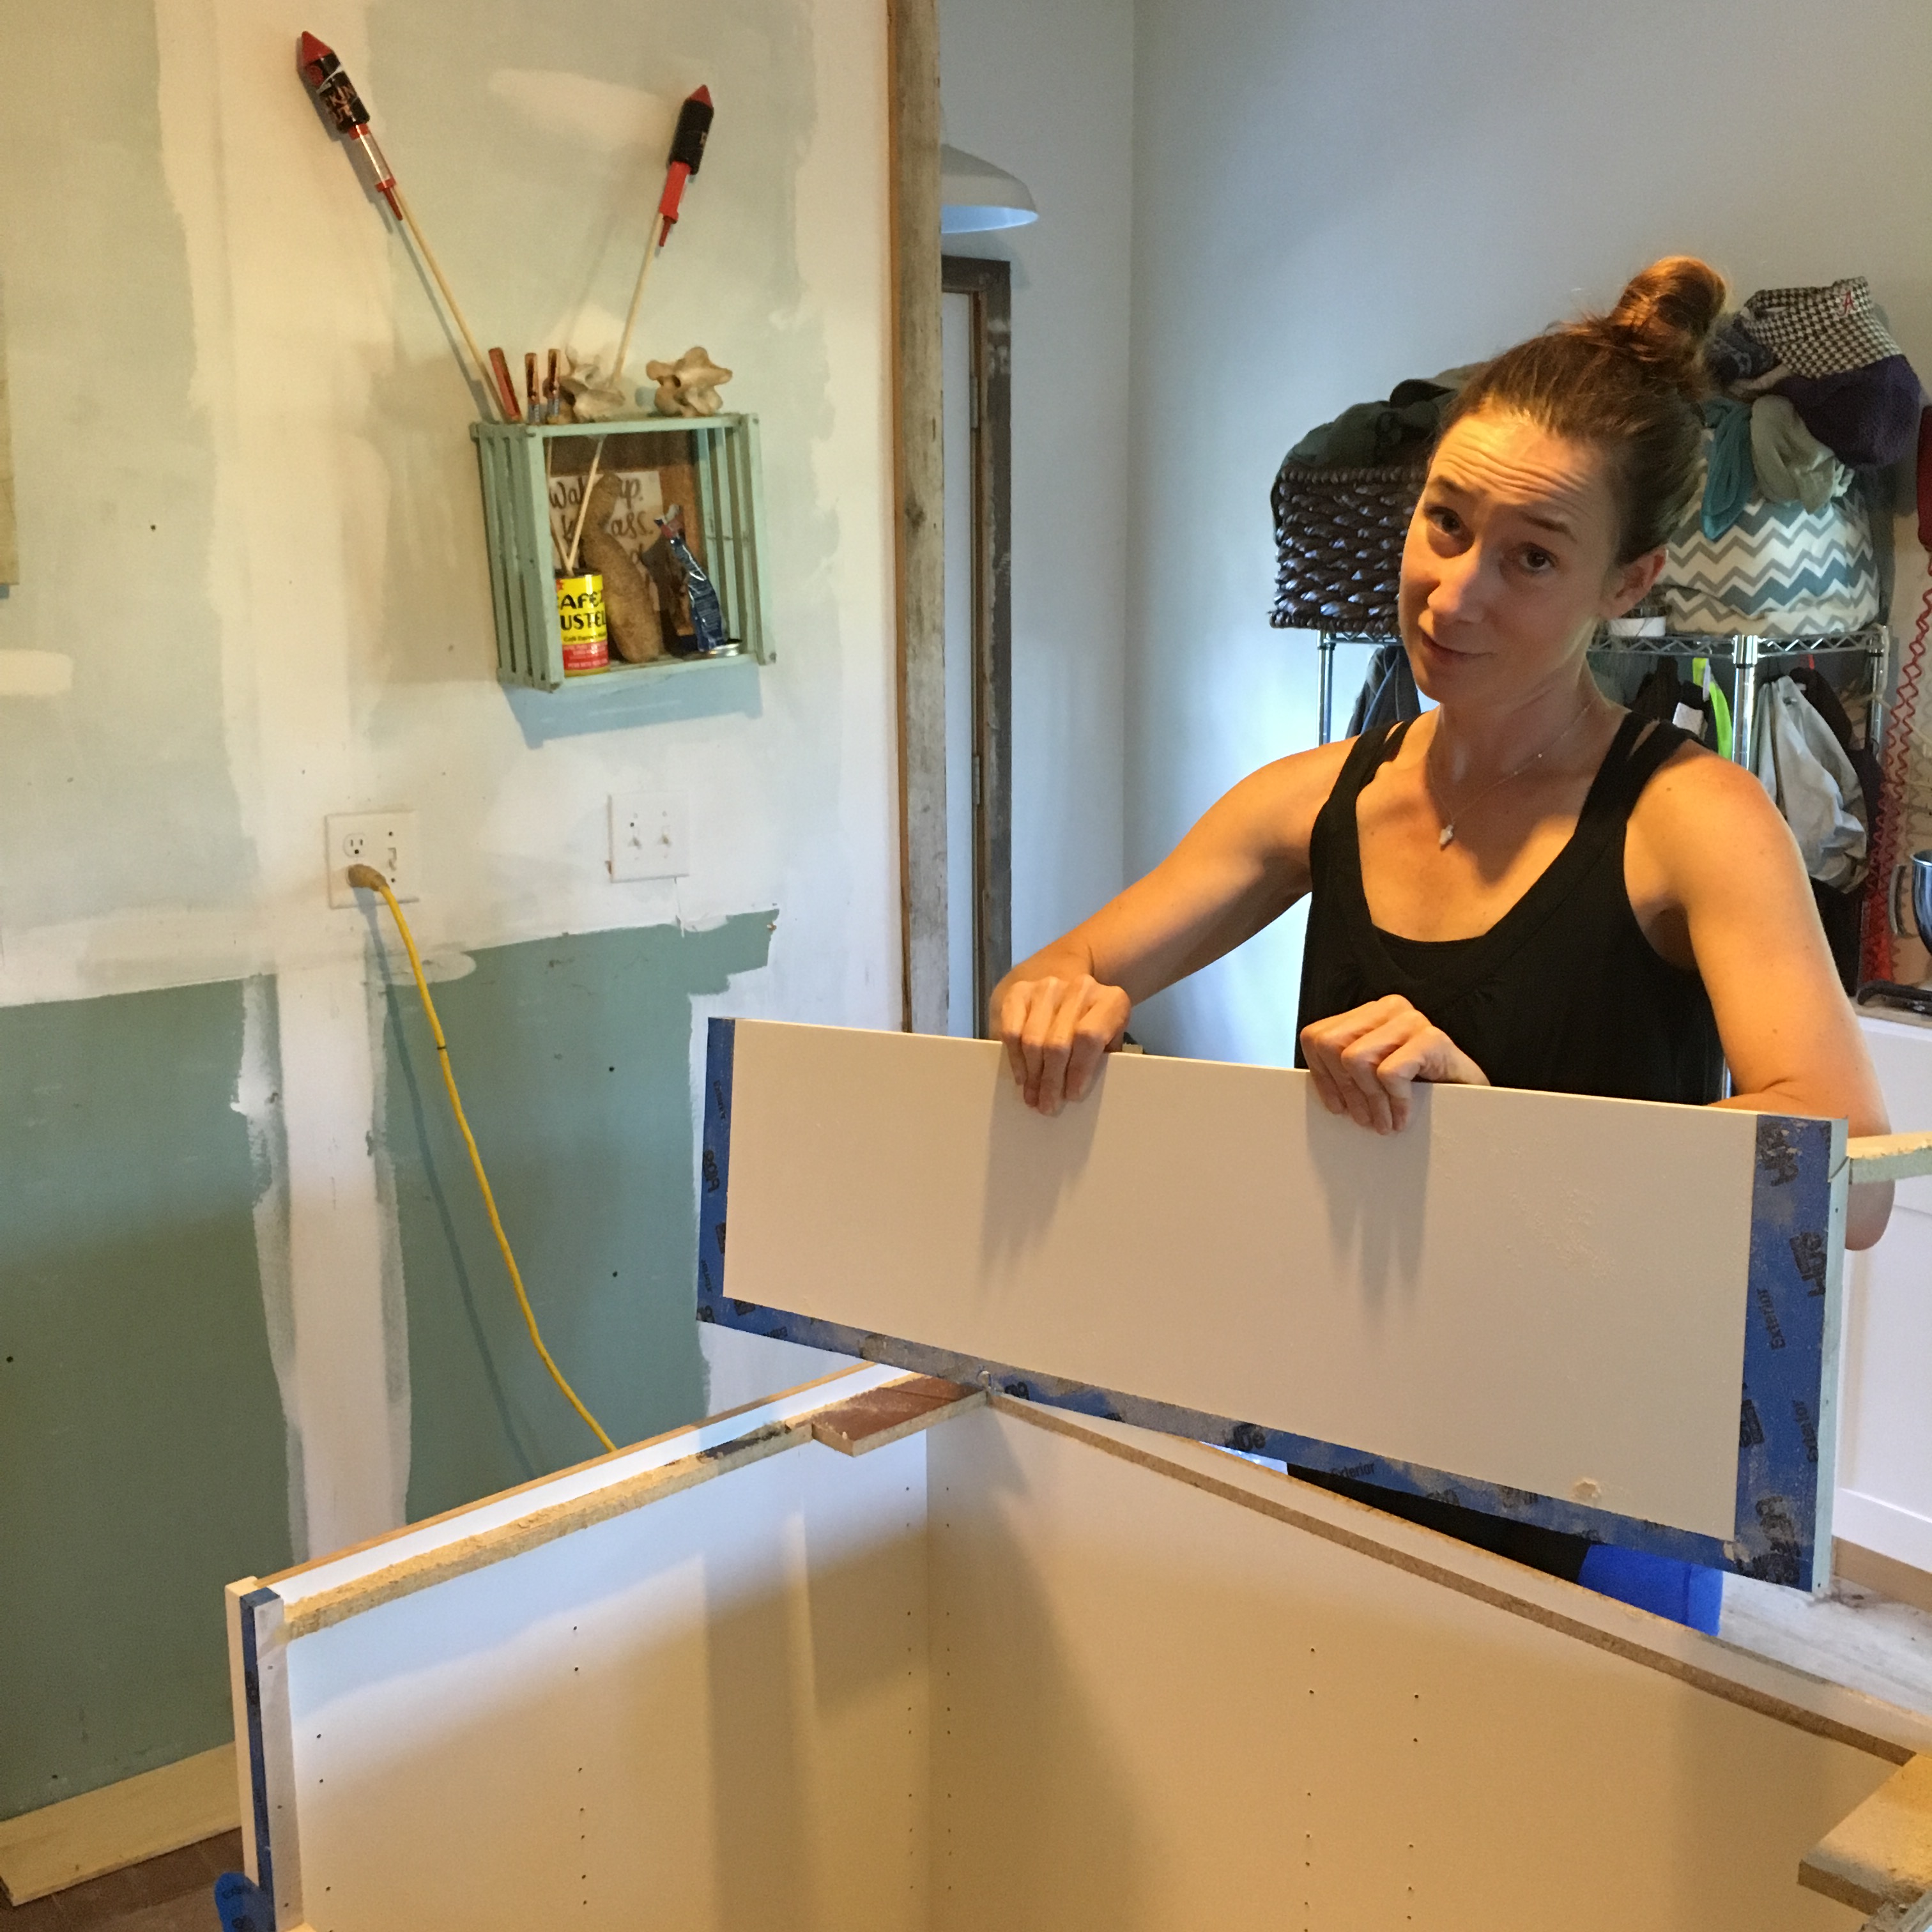
Next, the rest of the sink wall…

And the stove wall…
And the catch-all wall…
This space is opposite the stove, next to the back door’s coat tree. The glass-front cooler (now just used as a cabinet for storage of our canned goods) actually sits under the window where the kitchen sink used to be.
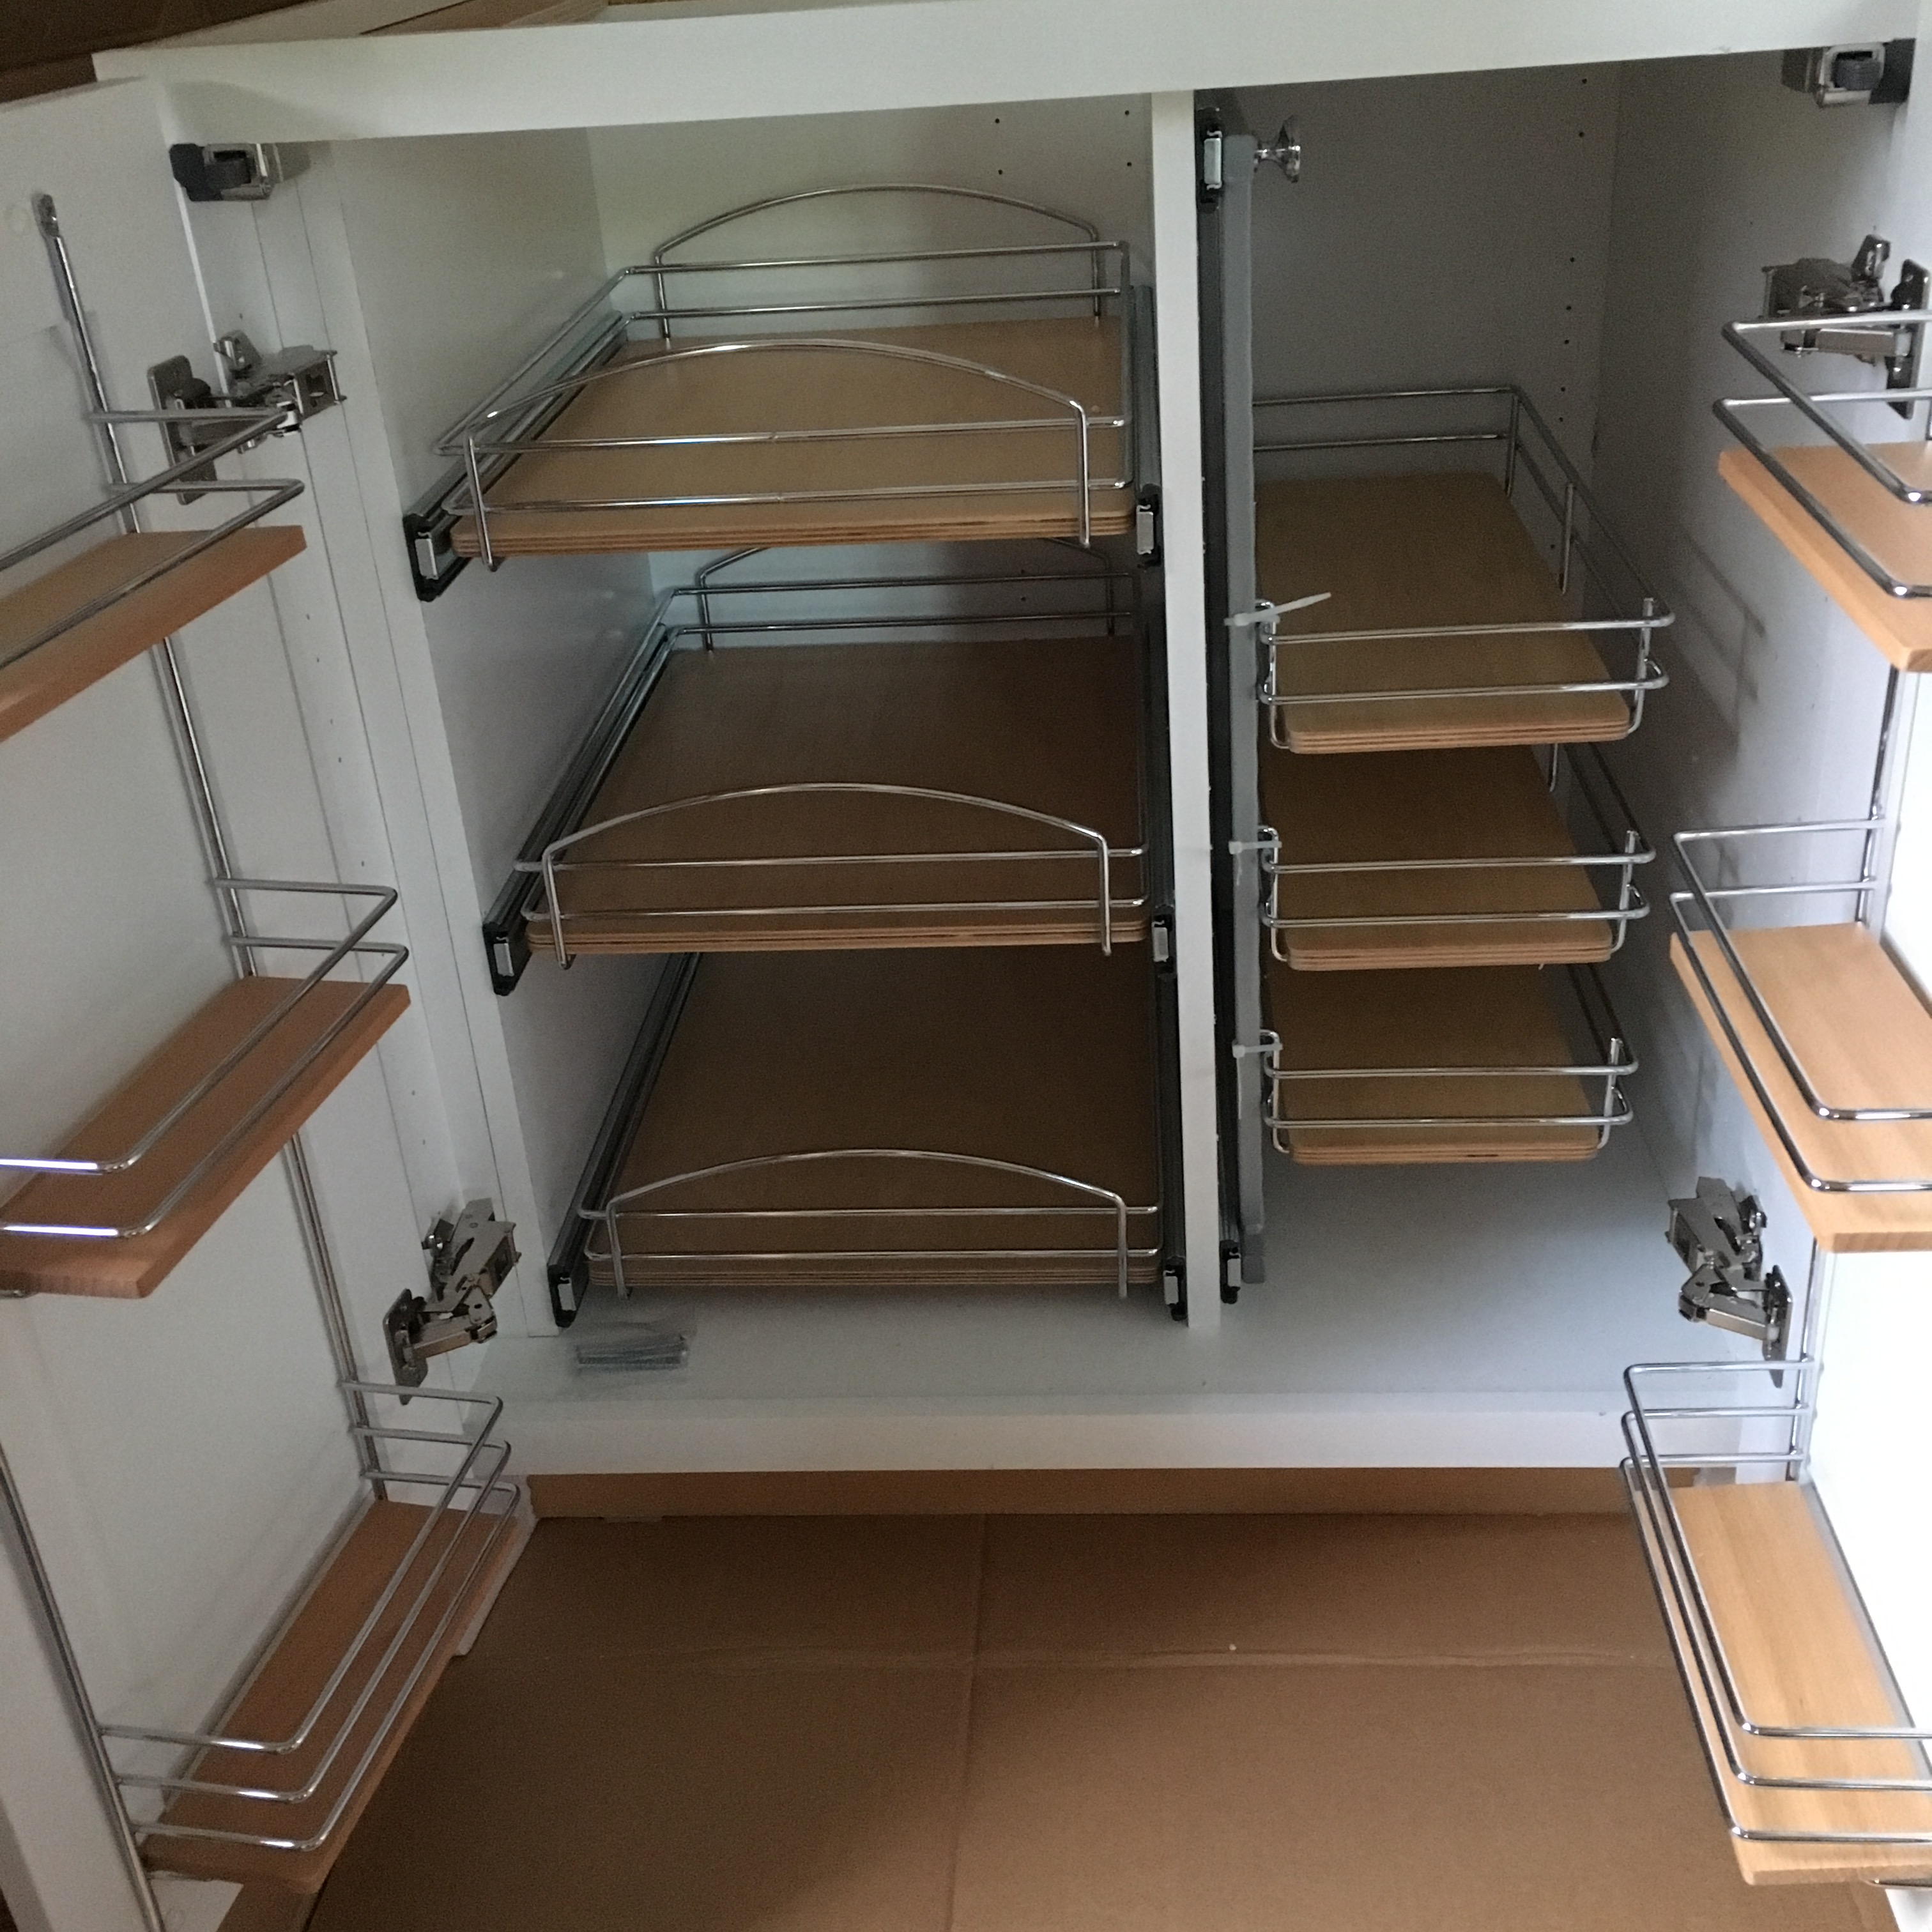
For this space, I designed a cabinet specifically to hold the large tote where we keep dog food. The tote sits on a slide-out drawer bottom so that we can open the cabinet doors and slide the drawer out without lifting the 50lbs or so of dog food. Genius! Until, of course, we decide the dog food lives somewhere else. But I’m sure I’ll come up with some other fabulous use for that amazing cabinet! Wait…I’m getting ahead of myself.

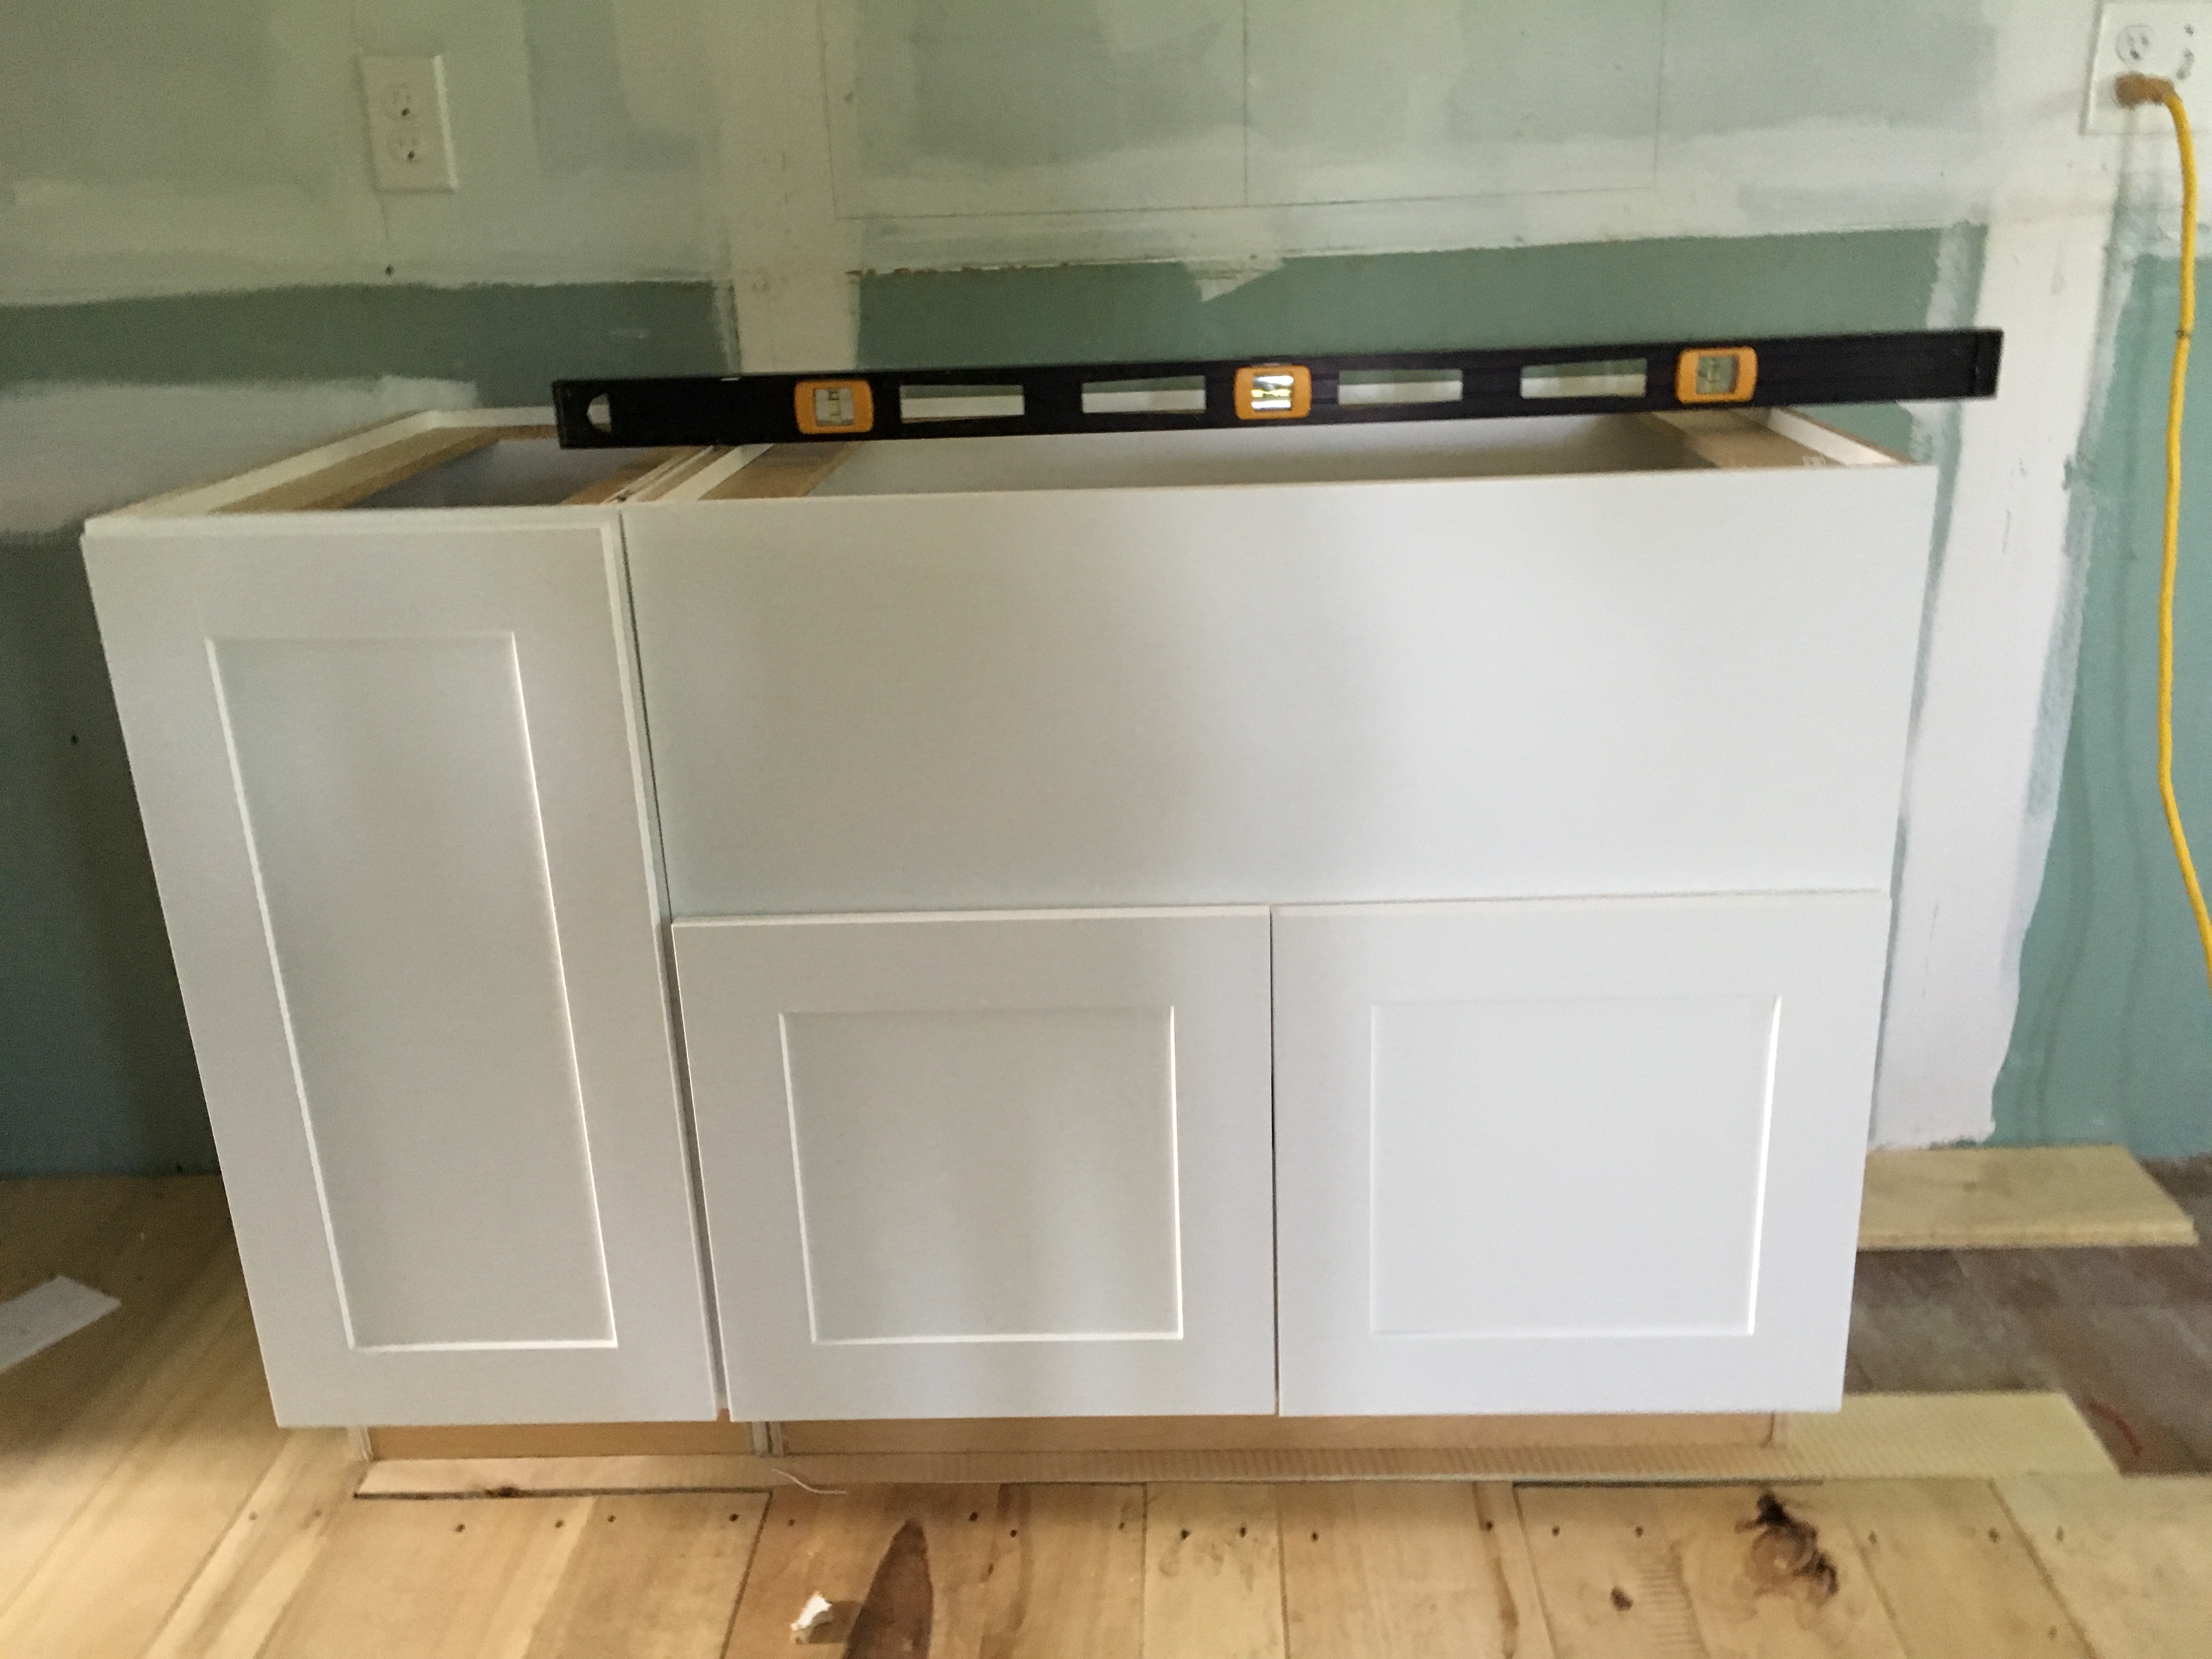
After the cabinets were all level and screwed to the walls, etc, etc, the countertop guys came out and measured for our solid-surface countertops. But it would be several weeks before those were fabricated and installed. So in the meantime, Ben made me some plywood counters.

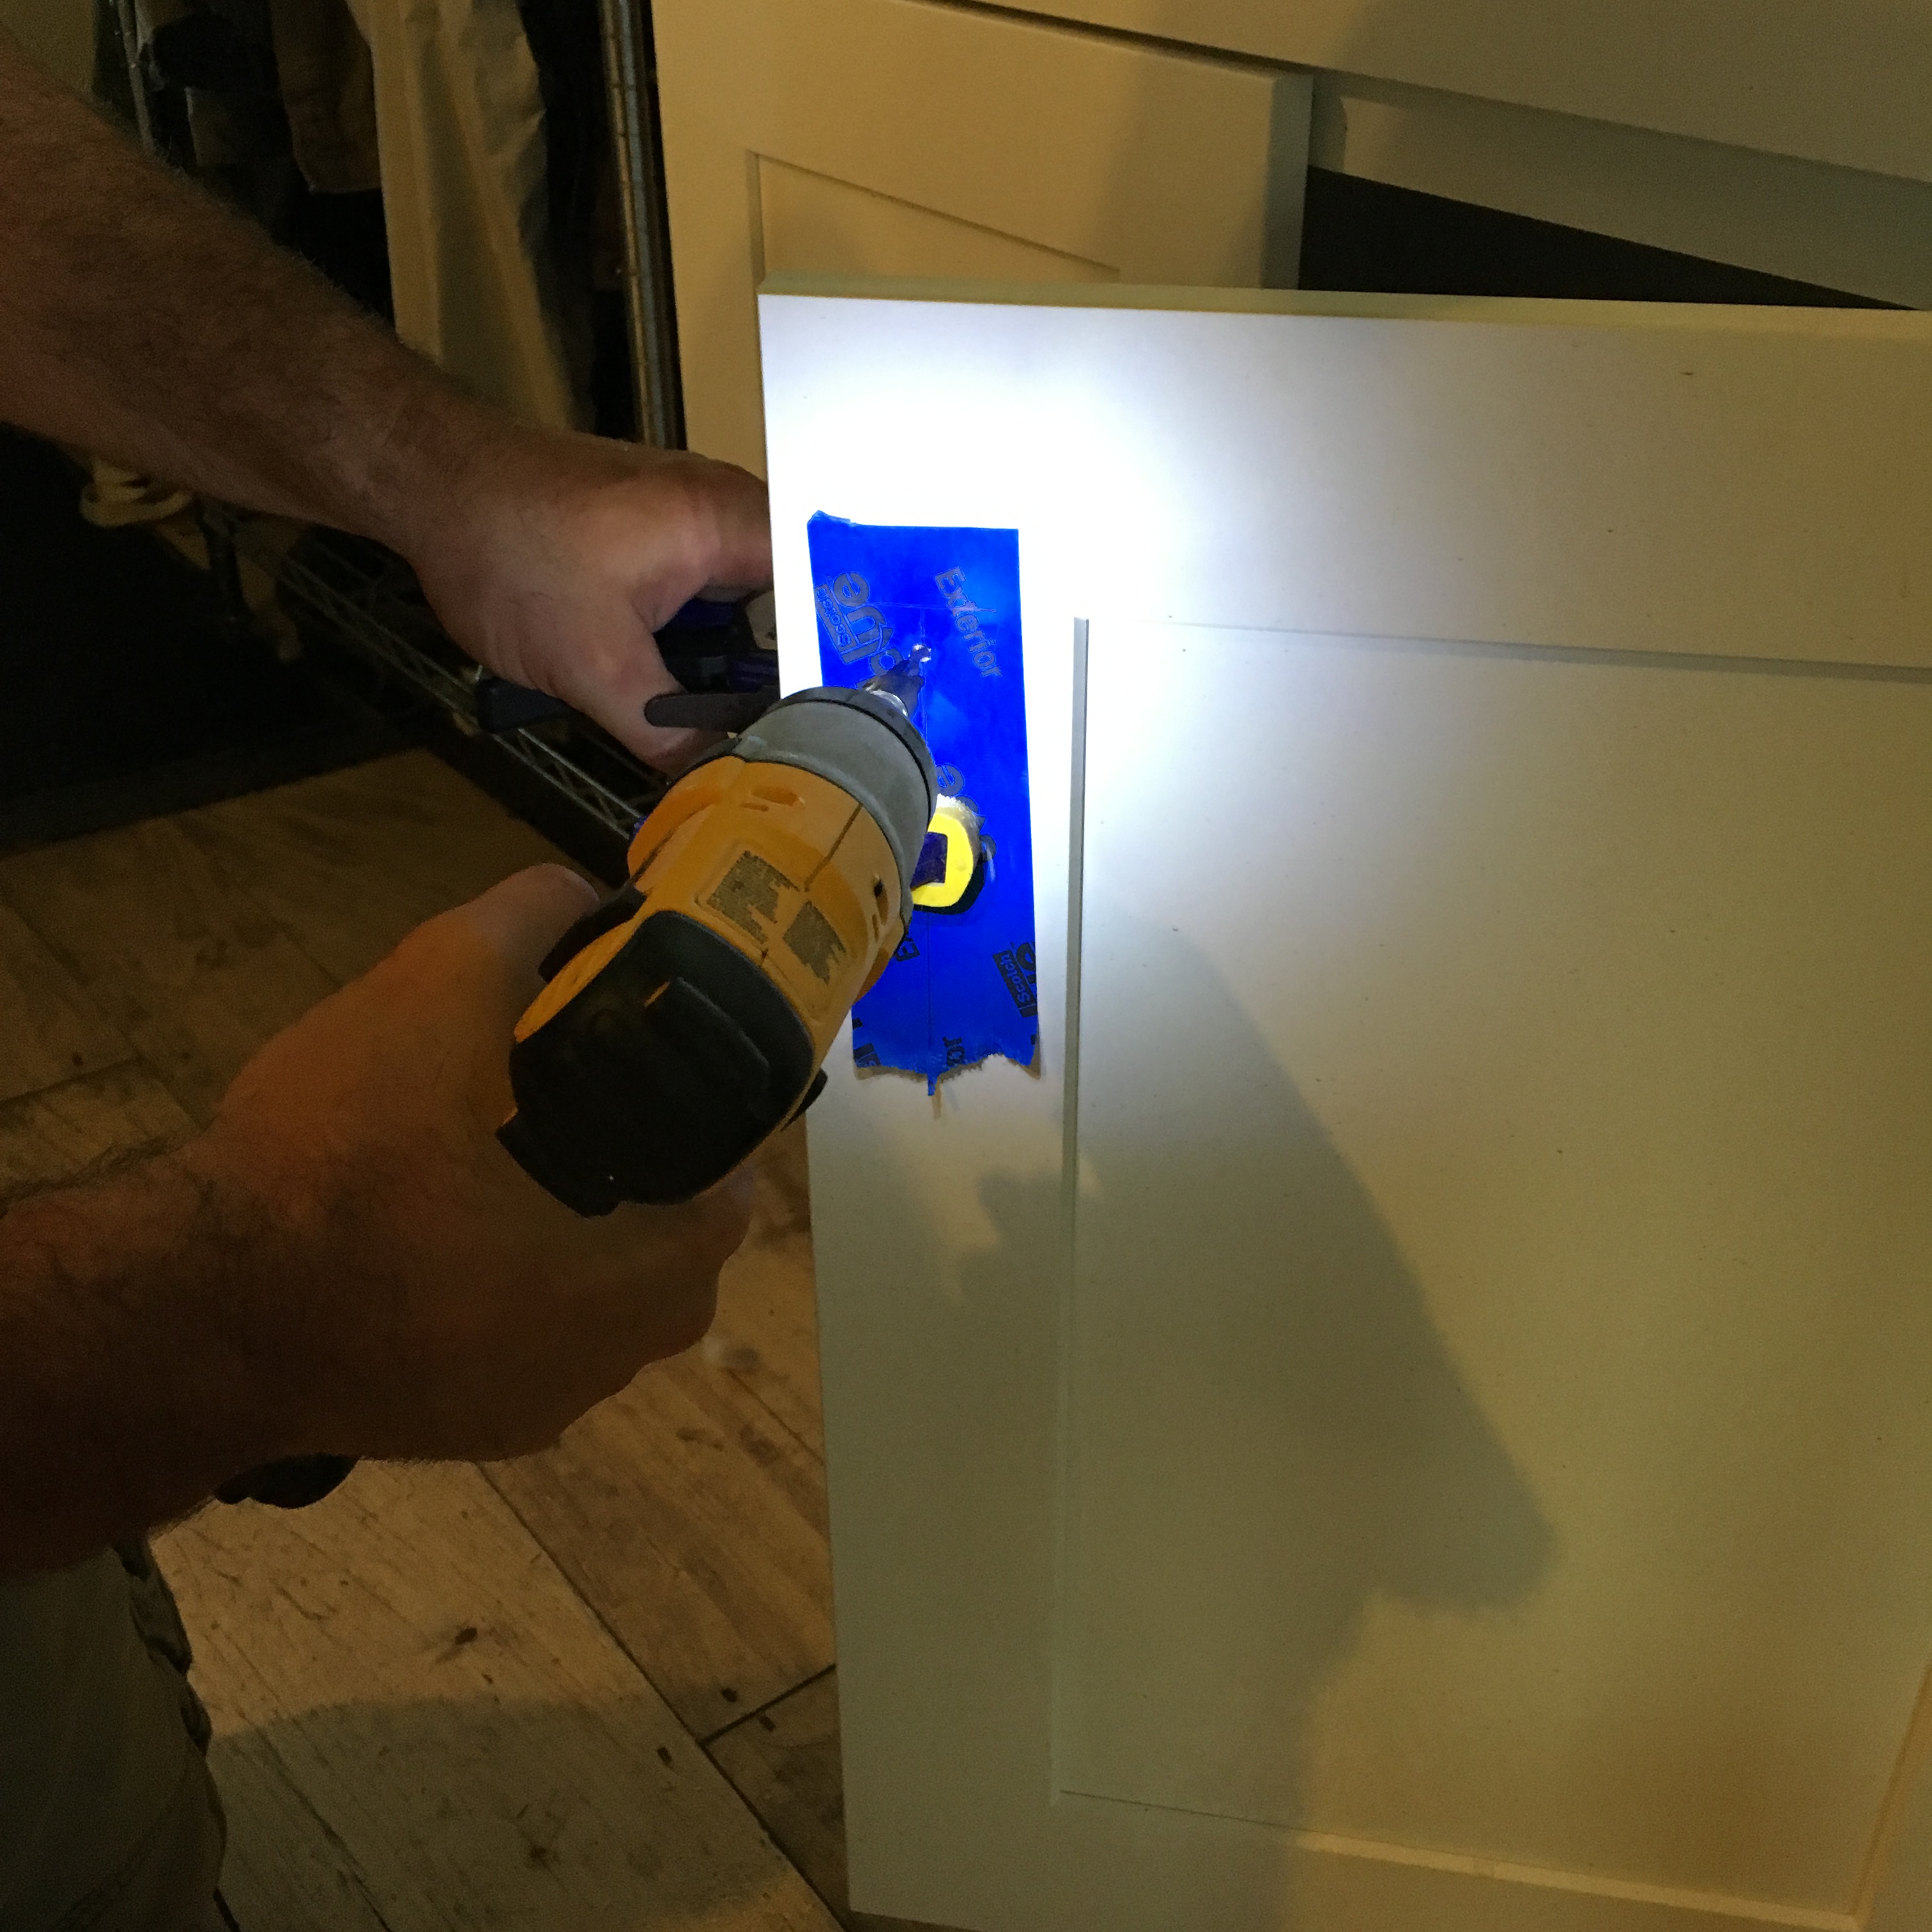
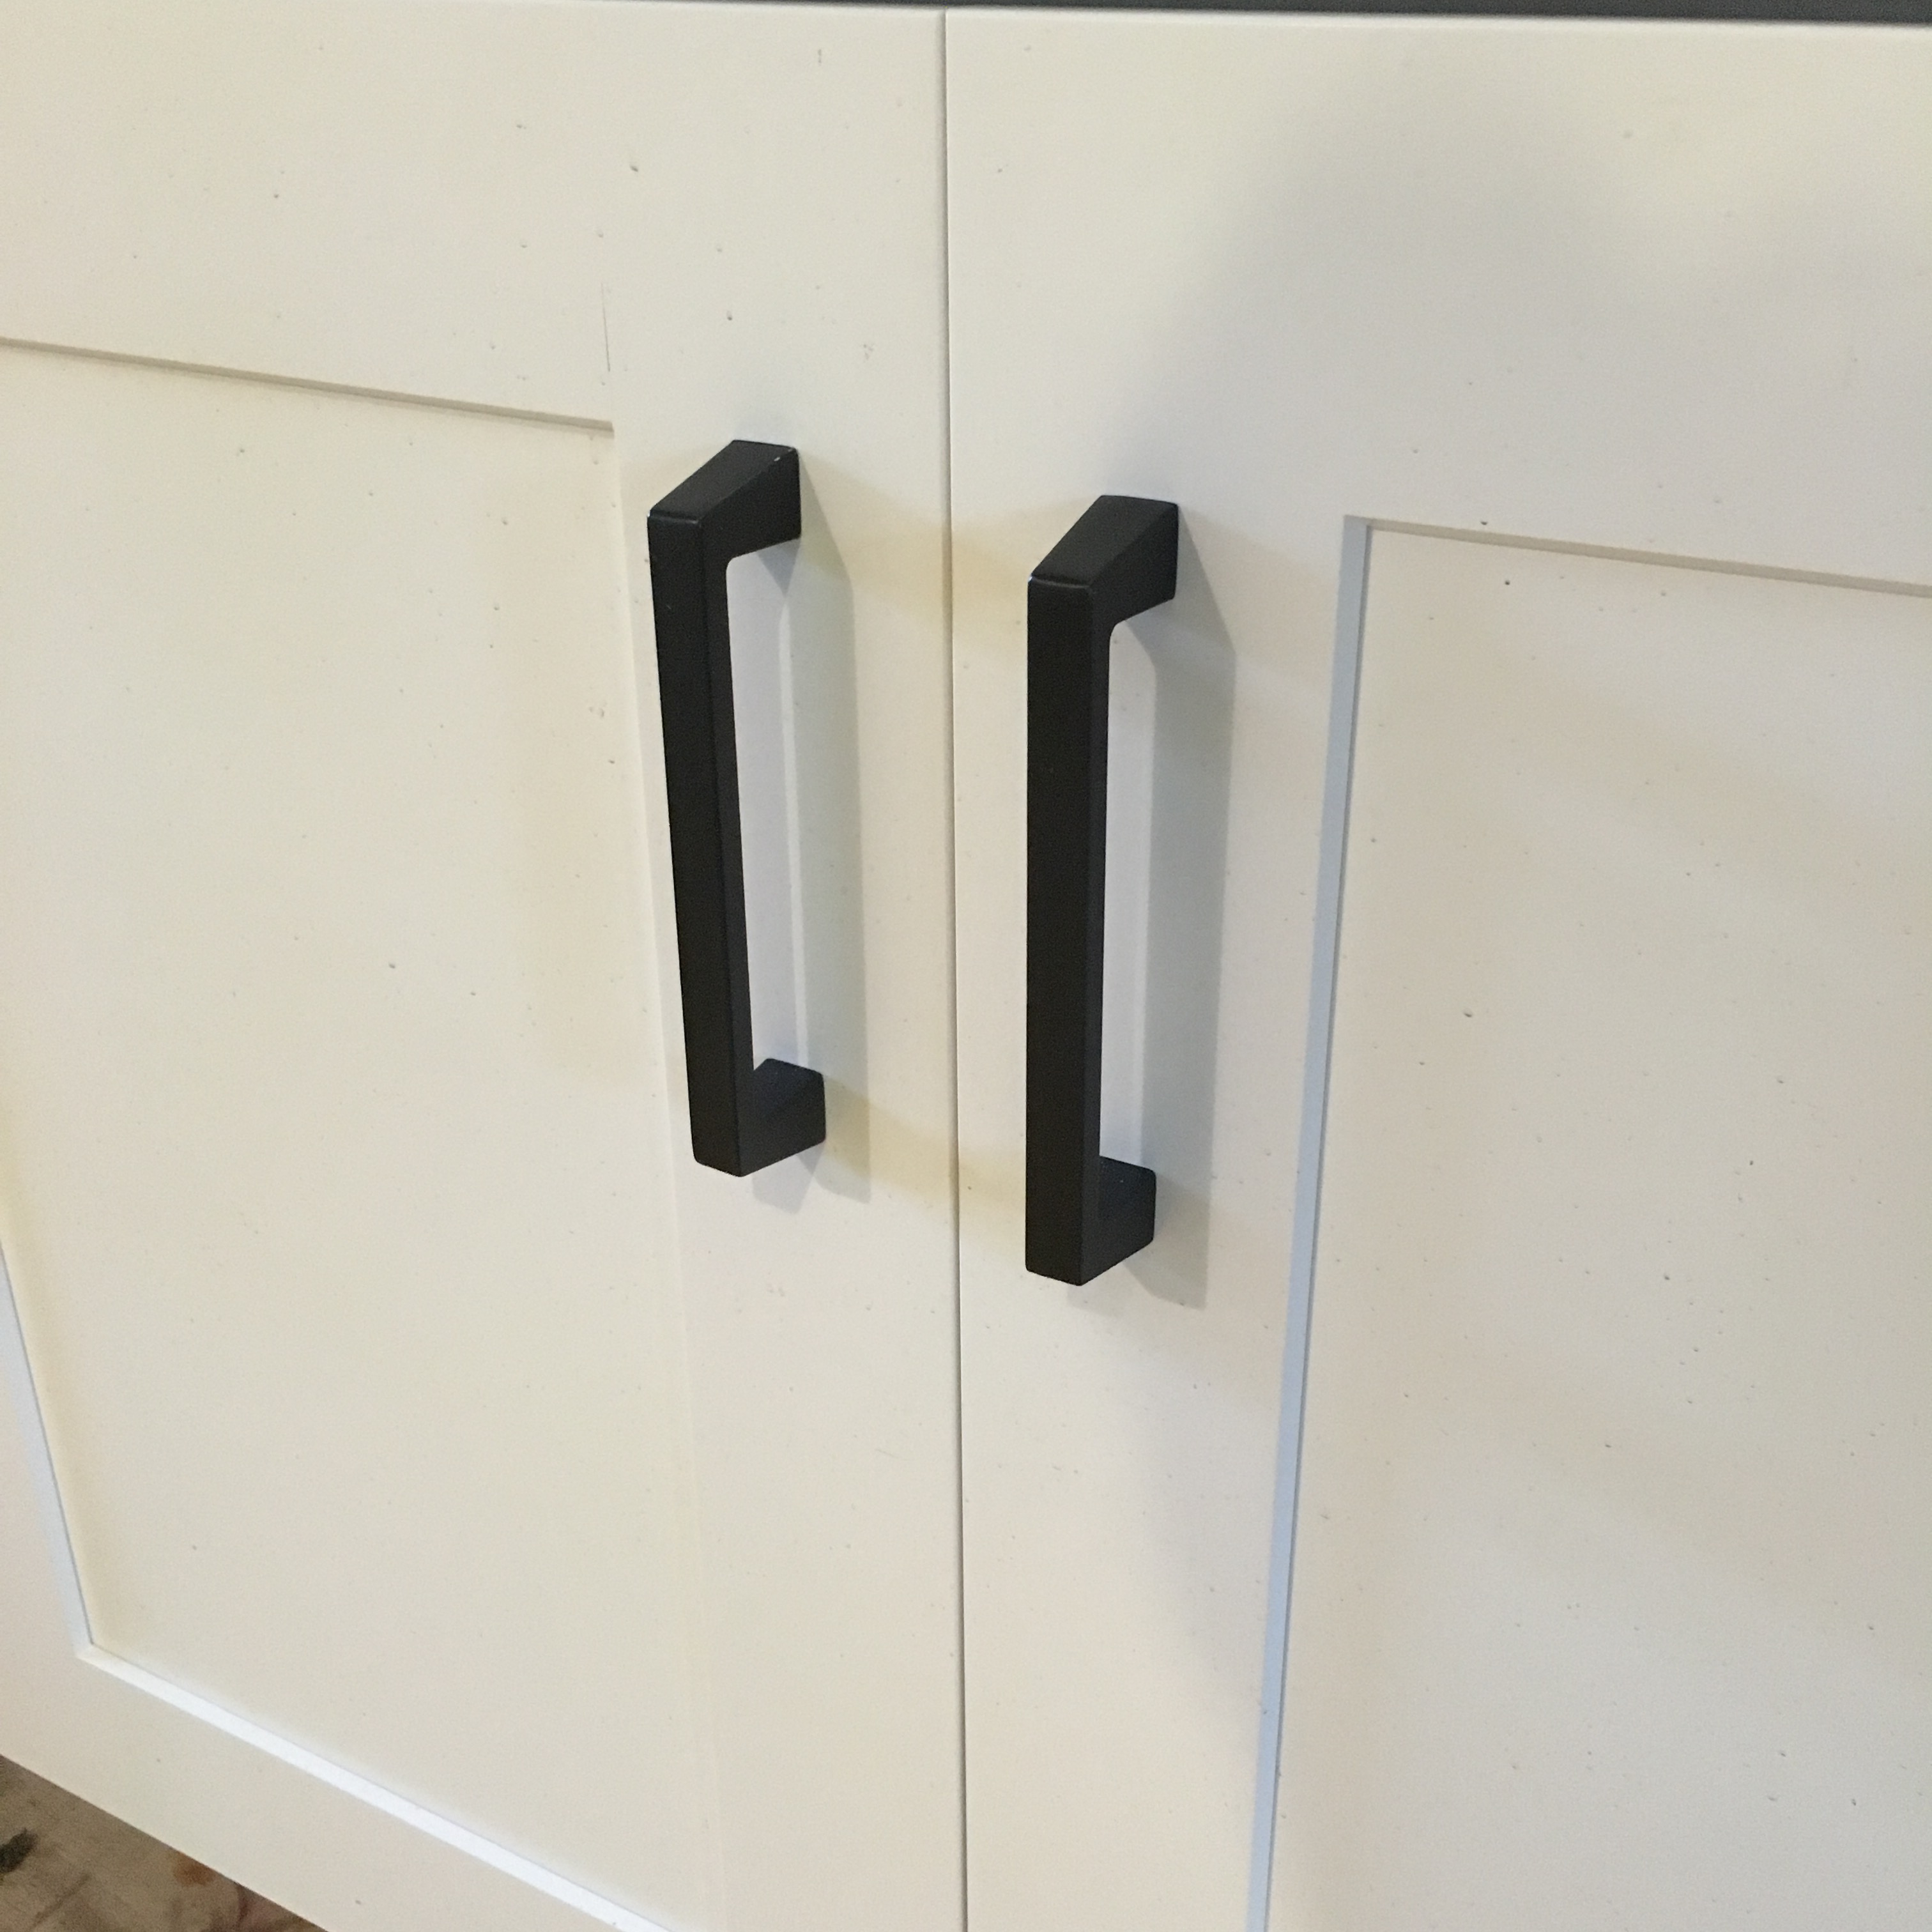
And I began the process of measuring and marking for all the gorgeous, simple Amrock hardware I’d ordered.

And Ben started installing those…
And then, the countertop guys were back to install…


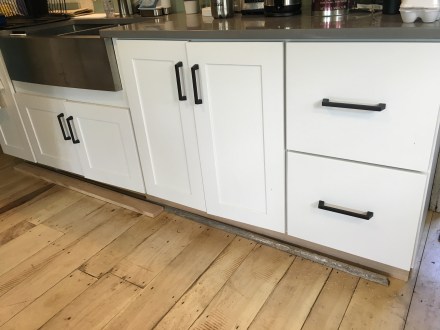
And then, I moved in…

And oh, be still my heart!! So gorgeous and so much exactly what I wanted! Now, we just need to finish up the toe kicks (see smattering of lumber options tucked in down there) and start tiling the wall behind the sink. It will be ceiling-to-counter white subway tile in a running bond pattern, with gray grout to match the counters. And then, floating shelves on the right, and bookcase-style shelving on the left to hold my lovely pottery bowls and cake stand collection. I know you can see it in your head. It’s so very chic, right? Stay tuned…this kitchen confidential is going public soon!

Love it! You’re giving me hope for our farmhouse renovation!
It looks SOOOO GOOD!!!
Pingback: 2016: Year in Review | Cockamamy Farm
Where did you get your sink? Looking for one like it but with single
Bowl.
Hi Stephanie! I bought it at Lowe’s. They have a single bowl version too! Good luck!